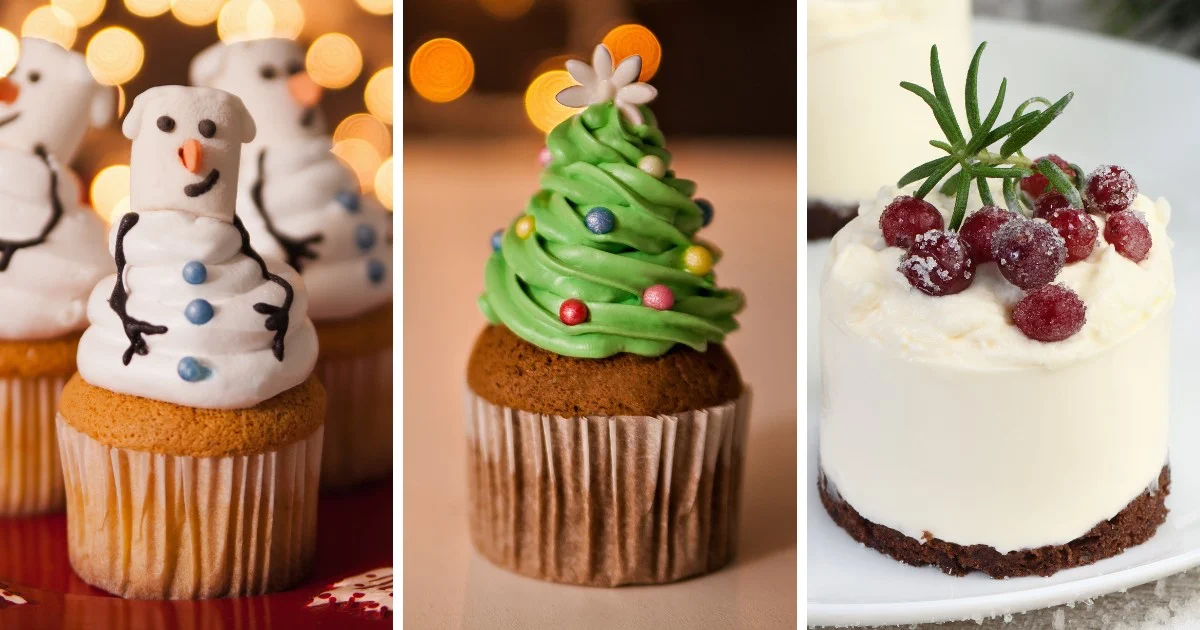
Christmas is right around the corner, and it’s time to start thinking about all the delicious treats that make this season special. Nothing says “festive” quite like a table full of sweet holiday desserts.
This year, I’ve gathered 30 of the best Christmas dessert recipes that are sure to bring some cheer to your celebrations.
Whether you’re baking for a family get-together, hosting a holiday party, or just want to enjoy a cozy treat by the fire, there’s something here for everyone.
These recipes range from easy Xmas desserts that you can whip up in a flash, to showstopper sweets that will impress any guest.
There’s no shortage of variety either, with Christmas baking ideas that include classic Christmas cookies, homemade candies, and even some cute and fun treats for the kids.
Don’t worry about spending hours in the kitchen, because many of these are simple to make, yet still look and taste like you spent the whole day baking.
From traditional favorites to new twists on holiday classics, these Christmas sweets and treats will surely add some sparkle to your dessert table.
So grab your apron and let’s get baking some delicious Christmas desserts that everyone will love!
Holiday Peppermint Cake
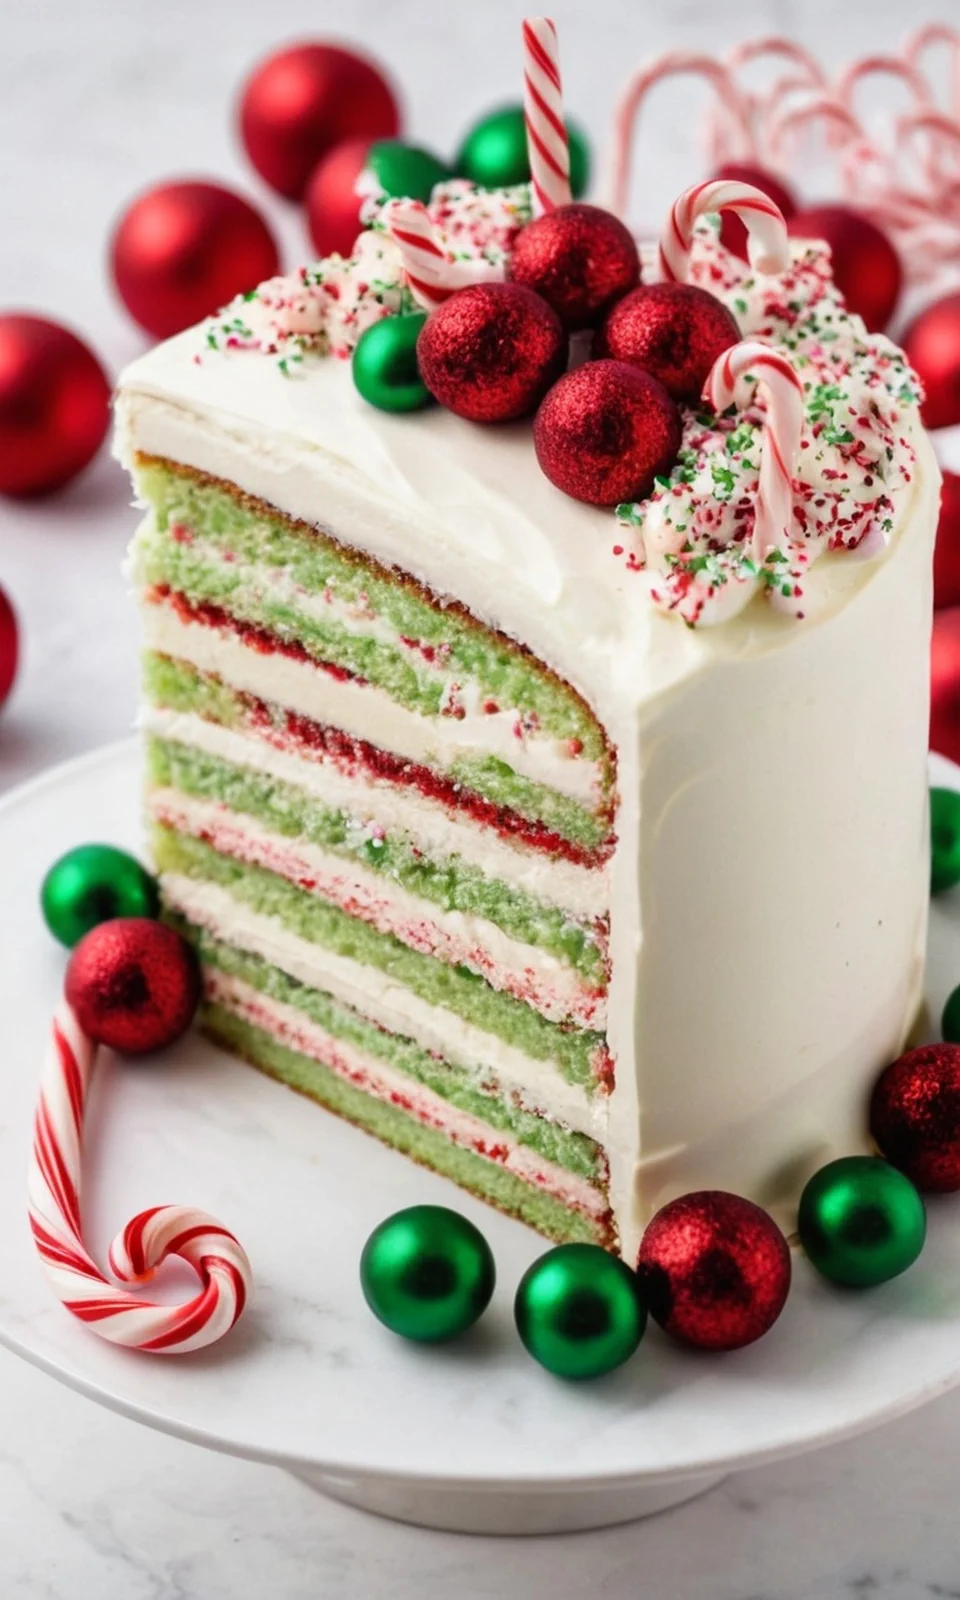
The Holiday Peppermint Cake is a delicious dessert that captures the festive spirit of the season with its invigorating peppermint flavor. It’s perfect for holiday gatherings and easy to make, especially if you use a boxed cake mix. With just a few ingredients and simple steps, you can create a cake that will impress your family and friends!
Ingredients:
- 1 box white cake mix (15.25 oz)
- ½ cup water
- 3 large eggs
- ⅓ cup vegetable oil
- ½ cup Torani Peppermint Syrup
- ½ cup softened butter
- 3 ¾ cups powdered sugar
- 3-4 tablespoons milk or water
- 2 teaspoons pure peppermint extract
- Crushed peppermint candy canes (for decoration)
Instructions:
- Preheat your oven to 350°F. Grease and flour two 9-inch cake pans.
- In a large bowl, combine the dry cake mix, water, vegetable oil, eggs, and peppermint syrup. Mix well until everything is combined.
- Pour the batter evenly into the prepared cake pans.
- Bake in the oven for 20-25 minutes. Check for doneness by inserting a toothpick; it should come out clean.
- While the cakes are cooling, prepare the frosting. In a bowl, mix together the softened butter, powdered sugar, milk or water, and peppermint extract until it’s fluffy.
- Once the cakes are completely cool, spread frosting between the layers and on the top and sides of the cake.
- Finally, decorate your cake with crushed peppermint candy canes for a festive touch.
When making this dessert, remember to check the baking time, as ovens can vary. If you want a less sweet frosting, you can reduce the amount of powdered sugar. Also, for an extra special flavor, consider making your own peppermint syrup at home! Store any leftover cake in an airtight container to keep it fresh.
Vegan Candy Meringue Kisses
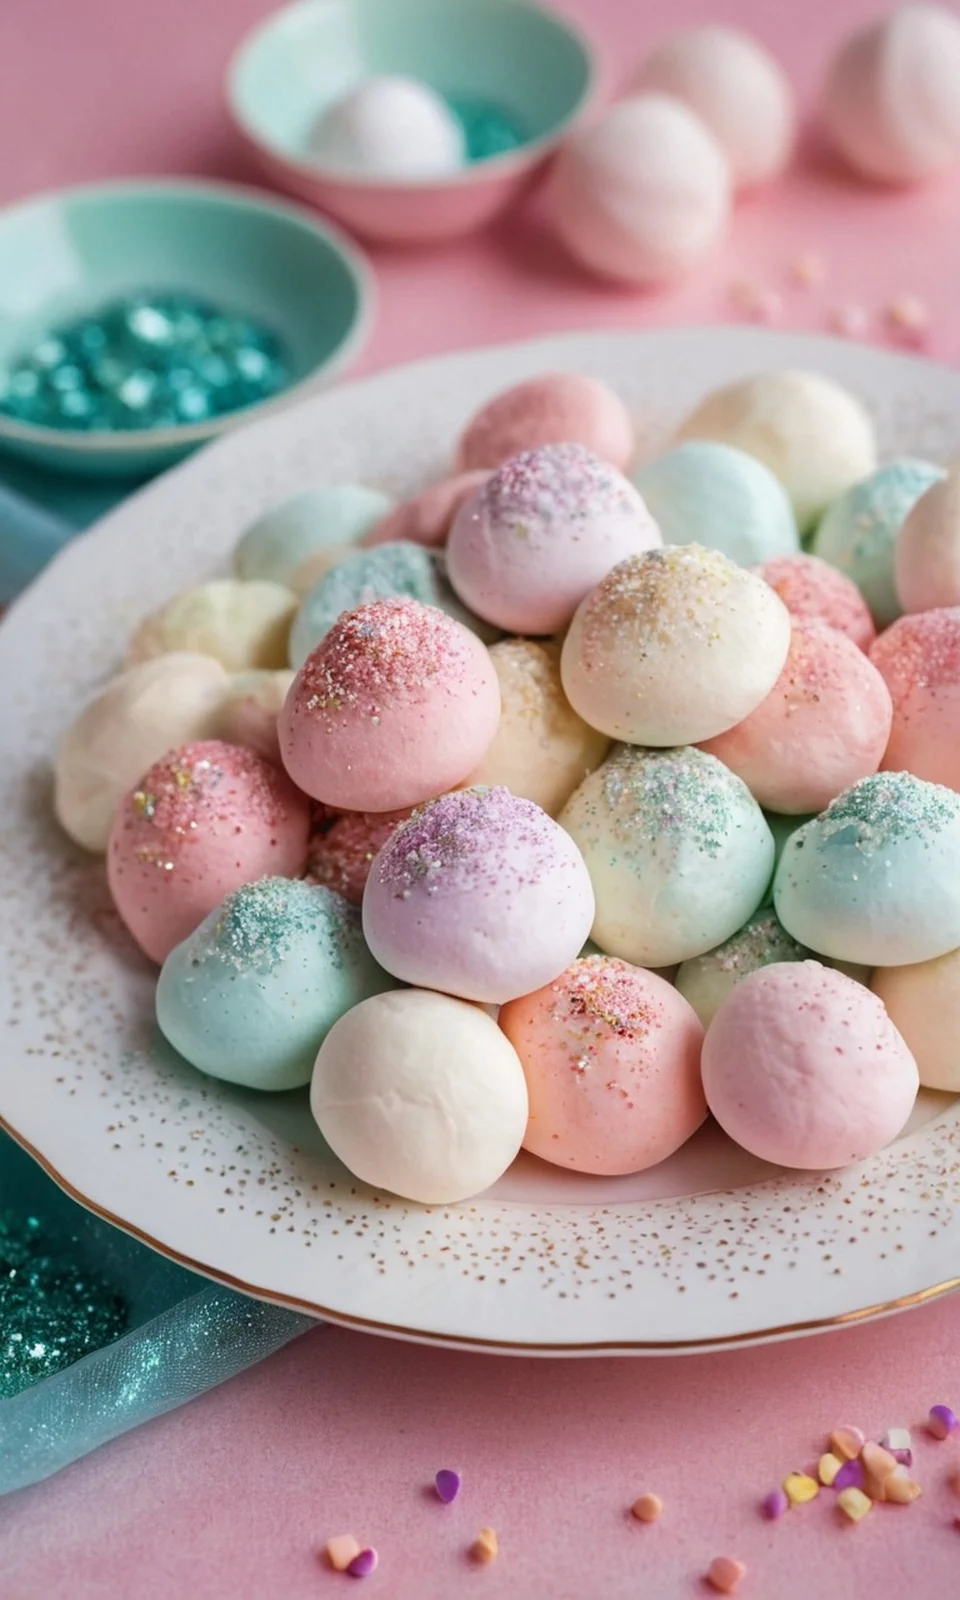
If you’re looking for a sweet treat this holiday season, these Vegan Candy Meringue Kisses are perfect! They’re light, airy, and have a delightful minty flavor that will remind you of candy canes. Plus, they’re completely vegan, making them a great option for everyone to enjoy during Christmas festivities.
Ingredients:
- Liquid from 1 x 400 g / 14 oz can of chickpeas
- 150 g / 1 ¼ cups icing, confectioners sugar
- 1 tsp peppermint extract
- 1 tsp vanilla extract
- Vegan-friendly red food dye
Instructions:
- Preheat your oven to 100°C (210°F) and line three baking trays with greaseproof paper.
- In a mixing bowl, whisk the chickpea liquid on high speed until soft peaks form. This might take a few minutes.
- Gradually add the icing sugar while continuing to whisk. Keep mixing until you have a glossy mixture.
- Gently mix in the peppermint and vanilla extracts until well combined.
- Use red food dye to create lines inside a piping bag. This will give your meringues a festive look when piped.
- Pipe your meringue mixture into desired shapes onto the lined baking trays.
- Bake the meringues in the oven for 2 hours. Once done, turn off the oven and let them cool inside for an additional hour.
For the best results, make sure to use the liquid from canned chickpeas, which is known as aquafaba. It’s important to whisk the chickpea liquid until it forms soft peaks—this will help create that light and airy texture we love in meringues. If you want to change the flavor, you can adjust the amount of peppermint extract to suit your taste.
Snowman Cake Pops

Snowman Cake Pops are a fun and festive treat that are perfect for Christmas celebrations! They’re cute, delicious, and easy to make with just a few simple ingredients. These cake pops can be decorated to look like cheerful snowmen, making them a hit at holiday parties or as gifts.
Ingredients:
- 1 box of cake mix (any flavor)
- 1 can of frosting (any flavor)
- White candy melts
- Lollipop sticks
- Mini chocolate chips (for eyes and buttons)
- Orange candy melts or orange icing (for noses)
- Colored candy melts (for hats and scarves)
Instructions:
- Bake the cake according to the package instructions. Let it cool completely.
- Once the cake is cool, crumble it into a large bowl until it resembles fine crumbs.
- Add half of the can of frosting to the cake crumbs and mix until well combined. The mixture should be moist and hold together.
- Scoop out small portions of the mixture and roll them into balls. Make some smaller for the heads and larger for the bodies of the snowmen.
- Place the cake balls on a baking sheet lined with parchment paper and refrigerate them for about 30 minutes to firm up.
- While the cake balls are chilling, melt the white candy melts in a microwave-safe bowl according to the package instructions.
- Take the larger cake balls out of the refrigerator and dip the end of a lollipop stick into the melted candy, then insert the stick into the center of the larger cake ball.
- Dip the entire cake ball into the melted white candy melts, making sure it’s fully covered. Allow any excess to drip off.
- Place the dipped cake pops back on the baking sheet and let them set until the candy coating hardens.
- Once set, use the colored candy melts to melt and create hats and scarves, and attach them to the snowmen.
- Use mini chocolate chips for the eyes and buttons, and shape small pieces of orange candy melts or use orange icing for the noses.
When making these cute cake pops, make sure to let the cake balls chill properly so they hold their shape when dipped. If you have trouble with the candy coating, try adding a small amount of vegetable oil to the melted candy to make it smoother. Have fun with the decorations! You can get creative and use different colors and designs for the hats and scarves to make each snowman unique.
Mini Chocolate Covered Strawberry Cheesecake
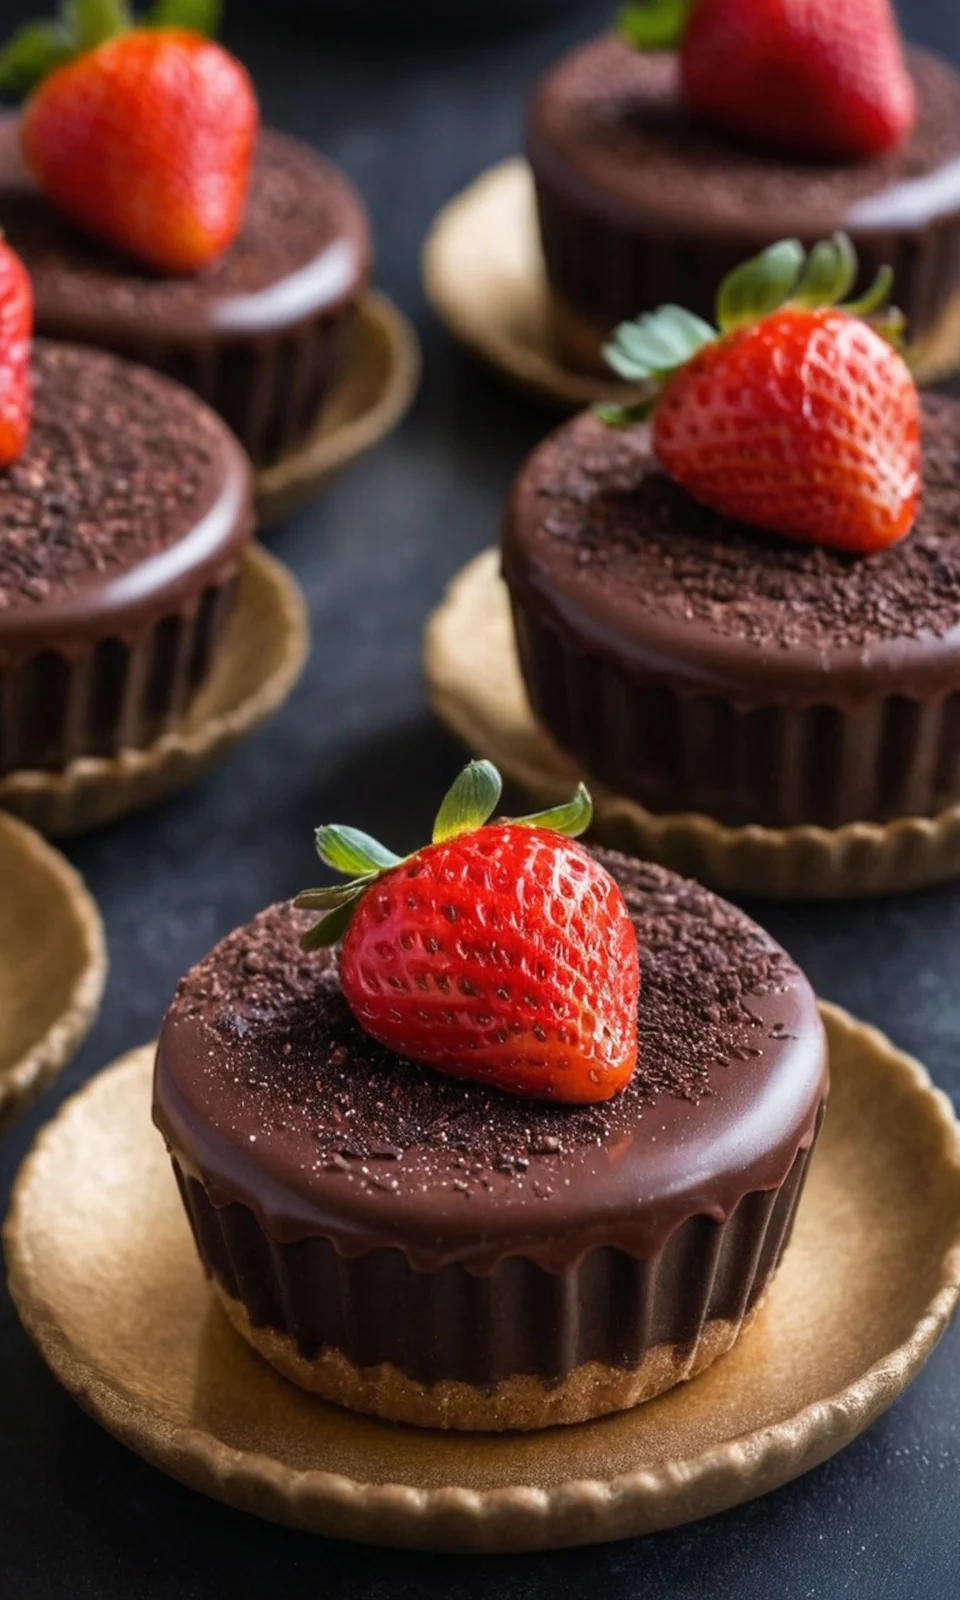
Mini Chocolate Covered Strawberry Cheesecakes are a delightful treat that combines the creamy goodness of cheesecake with the sweetness of strawberries and the richness of chocolate. These bite-sized desserts are light and fluffy, making them perfect for any occasion, especially during the holidays. With a crunchy graham cracker crust and a beautiful chocolate topping, these mini cheesecakes are sure to impress your family and friends!
Ingredients:
- 8 oz cream cheese, softened
- 1/2 cup granulated sugar
- 2 large eggs
- 1 cup graham cracker crumbs
- 1/4 cup melted butter
- Chocolate (for dipping)
- Fresh strawberries (for topping)
Instructions:
- Preheat your oven to 375°F. Once heated, reduce the temperature to 350°F.
- In a bowl, mix the cream cheese and sugar together until it’s smooth. Add the eggs one at a time and mix until combined.
- In another bowl, combine the graham cracker crumbs and melted butter. Mix until the crumbs are well-coated.
- Line a mini muffin tin with paper cups. Press the graham cracker mixture into the bottom of each cup to form the crust.
- Pour the cheesecake mixture over the crust in each muffin cup, filling them about 3/4 full.
- Bake in the preheated oven for about 15-18 minutes, or until the centers are set.
- Remove from the oven and let them cool completely. Once cooled, chill them in the refrigerator for at least 2 hours.
- Before serving, dip fresh strawberries in melted chocolate and place them on top of each cheesecake.
Make sure to whip the cream cheese and sugar until smooth to avoid lumps in your cheesecake mixture. If you notice any cracks in the cheesecakes after baking, don’t worry! You can cover them with the chocolate-covered strawberries, which will also add a nice touch. For an extra special treat, consider drizzling some melted chocolate over the top just before serving. Enjoy your mini cheesecakes chilled for the best flavor and texture!
Easy Chocolate Pretzel Bites

Chocolate Caramel Pretzel Bites are a delicious and fun treat perfect for the holidays! They combine sweet chocolate, gooey caramel, and crunchy pretzels to create a tasty snack that everyone will love. Plus, they’re easy to make and can be decorated with colorful sprinkles to add a festive touch.
Ingredients::
- Pretzels (small, square shape works best)
- Caramel squares
- Semi-sweet chocolate chips
- Milk chocolate chips
- Holiday-themed sprinkles (optional)
Instructions::
- Preheat your oven to 375°F (190°C) and line a baking sheet with parchment paper or a silicone mat.
- Place the pretzels on the baking sheet, making sure they’re spaced out.
- Take half of the caramel squares and place one on top of each pretzel.
- Bake in the preheated oven for about 3-5 minutes, or until the caramel is soft but not overflowing.
- Remove the baking sheet from the oven and let the pretzels cool completely.
- While the pretzels cool, melt the semi-sweet and milk chocolate chips in a microwave-safe bowl, heating in 30-second intervals until smooth.
- Dip each pretzel into the melted chocolate, covering it completely or just half, depending on your preference.
- Tap the pretzel on the side of the bowl to remove excess chocolate, then place it back on the baking sheet.
- If desired, sprinkle holiday-themed sprinkles over the chocolate-covered pretzels before the chocolate sets.
- Allow the chocolate to harden completely before storing the pretzel bites in an airtight container.
Make sure to keep an eye on the caramel while it’s baking, as you want it to be soft but not melted all over the baking sheet. If you want to add a little more flavor, consider mixing in some sea salt on top of the chocolate before it sets. Feel free to get creative with the sprinkles or even try drizzling extra melted chocolate on top for a decorative touch.
Gingerbread Cookies

Gingerbread cookies are a classic holiday treat that fills your home with a warm, spicy aroma and brings a festive spirit to any occasion. They’re perfect for decorating, sharing with friends and family, or just enjoying with a cup of hot cocoa.
Ingredients:
- 3/4 cup butter, softened
- 1 cup brown sugar, packed
- 1/2 cup molasses
- 1 egg
- 4 cups all-purpose flour
- 1 teaspoon baking soda
- 1 tablespoon ground ginger
- 1 tablespoon ground cinnamon
- 1/2 teaspoon ground cloves (optional)
- 1 tablespoon fresh ginger (optional)
- 1 tablespoon orange zest (optional)
- 1 teaspoon vanilla extract
Instructions:
- In a large bowl, beat the softened butter, brown sugar, and molasses together until fluffy. Add the egg and vanilla extract, mixing well.
- In another bowl, whisk together the flour, baking soda, ground ginger, cinnamon, cloves (if using), fresh ginger (if using), and orange zest (if using).
- Gradually mix the dry ingredients into the wet mixture, being careful not to overmix.
- Divide the dough into two discs, wrap each in plastic wrap, and chill in the refrigerator for 2-3 hours.
- Preheat your oven to 350°F (175°C). Roll out the chilled dough on a floured surface to about 1/4 inch thick. Use cookie cutters to cut out shapes.
- Place the cookie shapes on a baking sheet lined with parchment paper. Bake for 9-10 minutes or until the edges are slightly crisp.
- Remove from the oven and let the cookies cool on a wire rack before decorating if desired.
Be sure to chill the dough properly as this helps the cookies keep their shape while baking. You can also experiment with different spices or add-ins, like chocolate chips or nuts, for a unique twist. If you’re planning to decorate your cookies, wait until they’re completely cool before using icing or other toppings to prevent melting.
Eggnog Pie
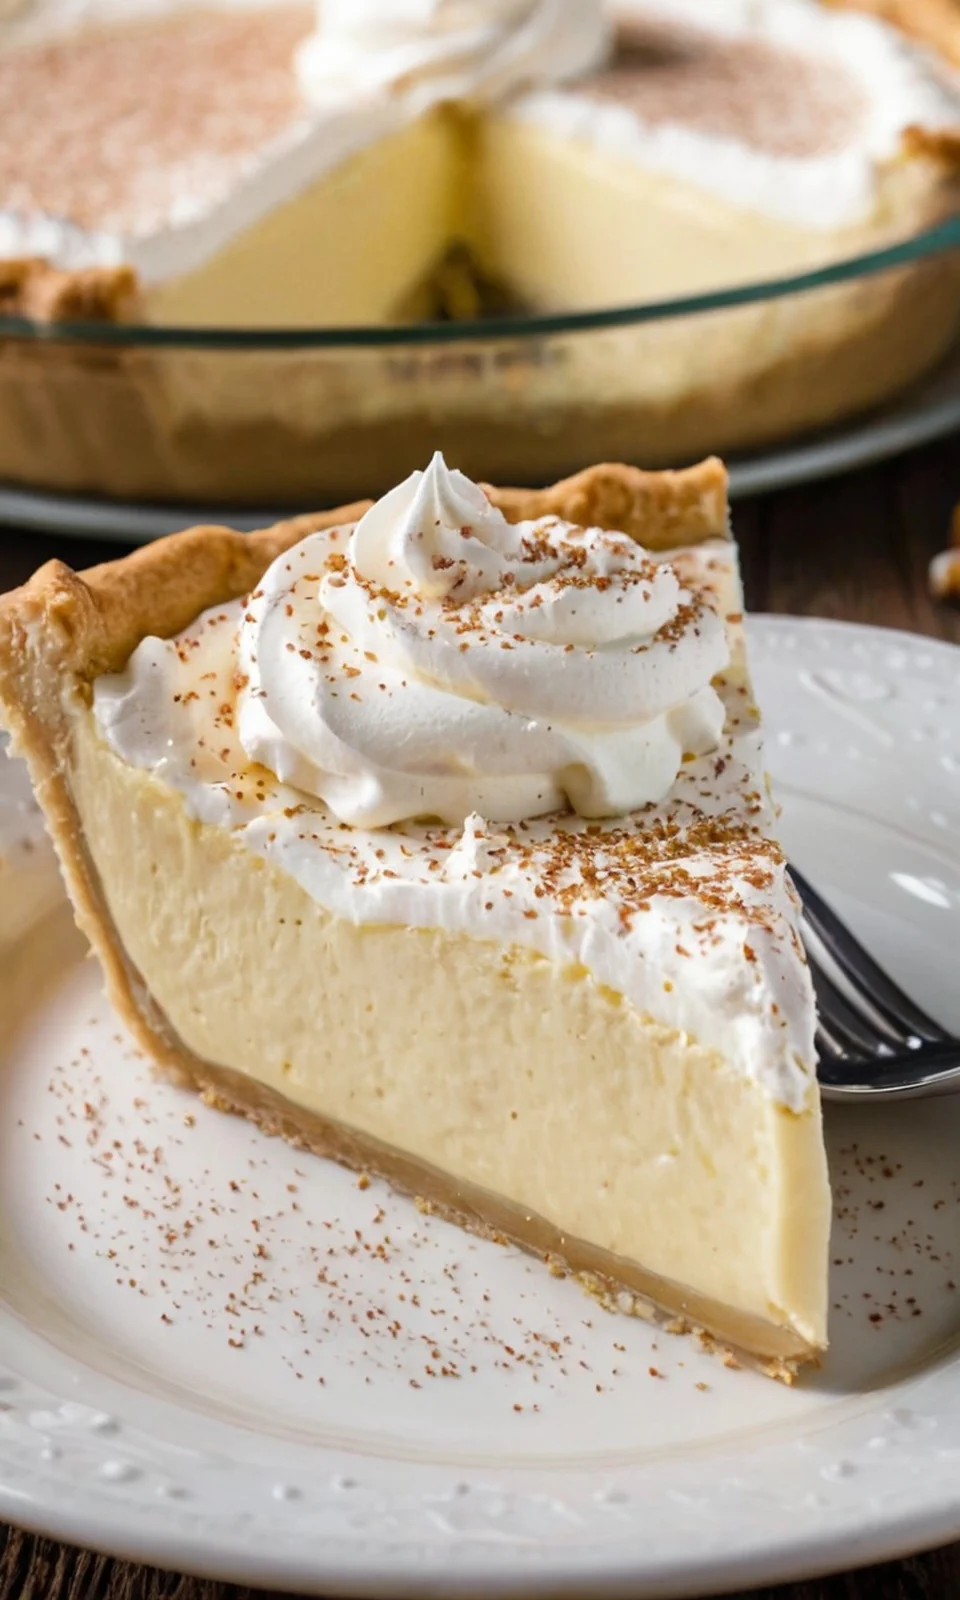
Eggnog Pie is a delicious no-bake dessert that’s perfect for the holiday season, especially during Thanksgiving and Christmas. With its light and fluffy texture, this pie is sure to be a hit with your family and friends. It takes just about 10 minutes to prepare, but remember to refrigerate it for at least 4 hours before serving so it sets properly. This recipe serves 8 people, making it an ideal choice for gatherings.
Ingredients:
- 1 prepared pie crust (graham cracker or frozen)
- 13.4 oz box of vanilla instant pudding mix (not stovetop)
- 1.5 cups of eggnog
- 2 cups of whipped topping (e.g., Cool Whip, thawed)
- A dash of nutmeg for flavor enhancement
Instructions:
- In a medium bowl, combine the eggnog and vanilla pudding mix. Beat the mixture until it thickens.
- Add a dash of nutmeg to the mixture and stir well.
- Gently fold in the whipped topping until the mixture is fluffy and has a pale yellow color.
- Spoon the mixture into the prepared pie crust and smooth it out with a spatula.
- Cover the pie and refrigerate it for at least 4 hours, or overnight, until it’s firm.
Feel free to customize it by using homemade whipped cream instead of store-bought for an extra special touch. You can also experiment with different types of pie crust, such as a chocolate graham cracker crust for a twist on the classic flavor. If you have leftover pie, it can be frozen and thawed in the refrigerator when you’re ready to enjoy it again.
Christmas Tree Brownies
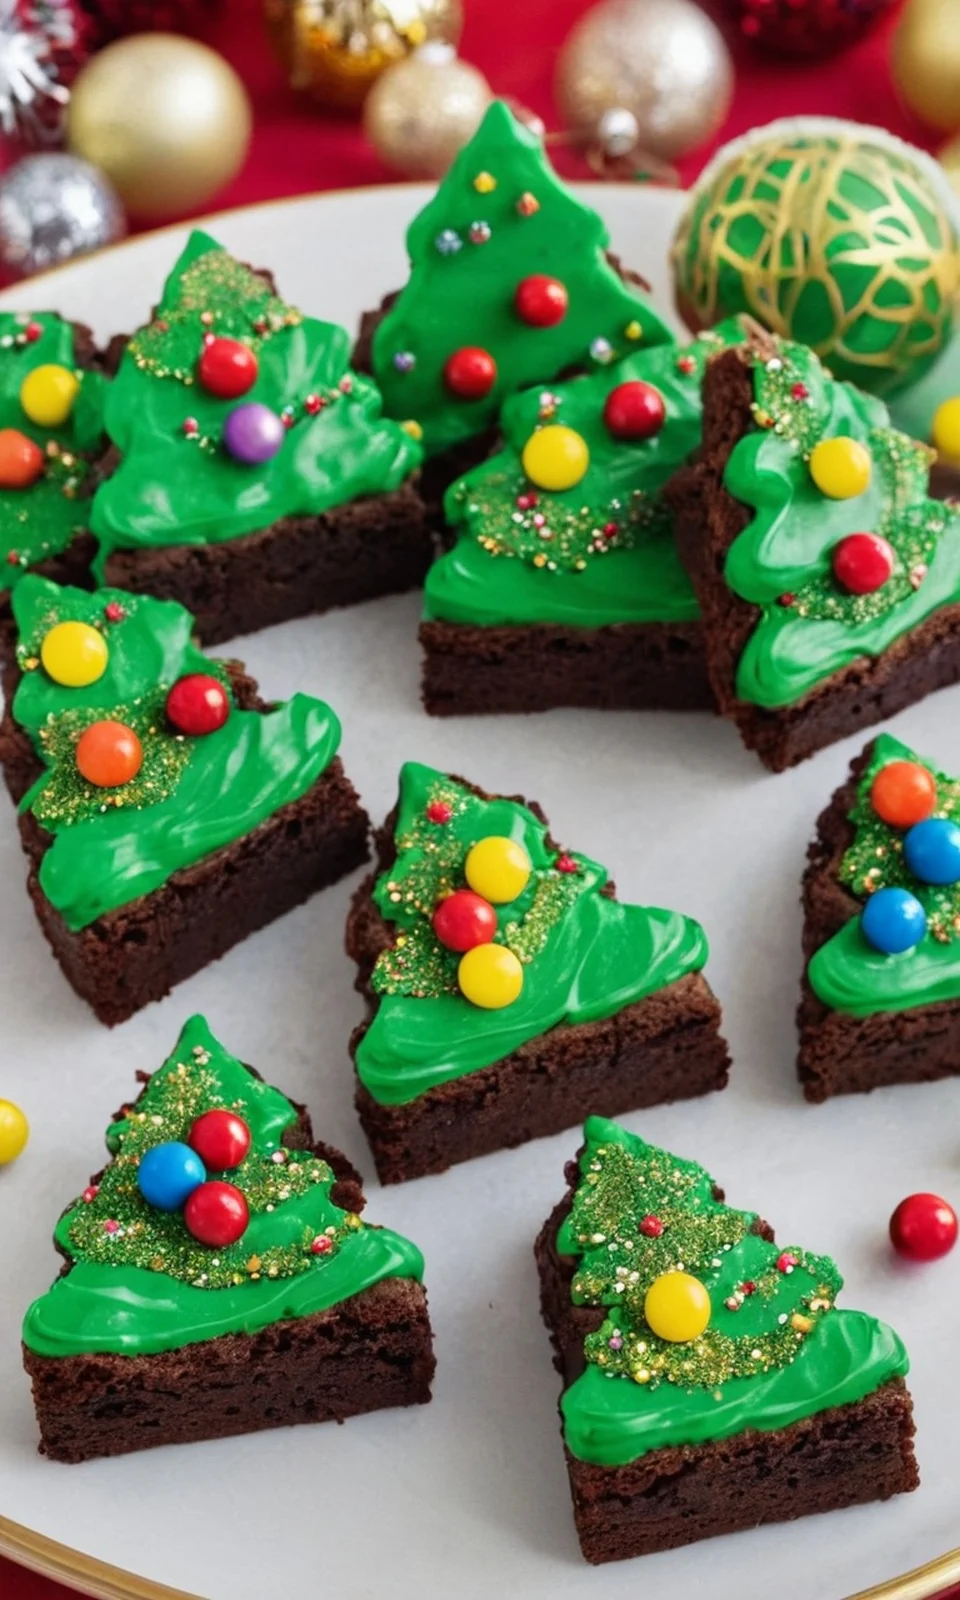
Get ready to bring some festive cheer to your holiday gatherings with these delicious Christmas Tree Brownies! They’re easy to make and visually appealing, combining rich chocolate flavors with a hint of peppermint. Using a boxed brownie mix and some fun decorations, you can create a delightful treat that everyone will love.
Ingredients:
- 1 box of brownie mix
- 1 tub of white vanilla icing
- Green food coloring
- Small round sprinkles
- Star sprinkles
- Candy canes (for tree trunks)
Instructions:
- Preheat your oven and line an 8×8 baking pan with aluminum foil. Spray the foil with cooking spray to prevent sticking.
- Prepare the brownie mix according to the package instructions and pour it into the prepared baking pan.
- Bake the brownies in the oven as directed on the box, then allow them to cool completely for about 1.5 hours.
- Once cooled, use a sharp knife to cut the brownies into triangle shapes, resembling Christmas trees.
- Take candy canes and cut them into small pieces to use as tree trunks. Attach them to the base of each brownie triangle.
- In a mixing bowl, add green food coloring to the white icing until you achieve your desired shade of green.
- Transfer the green icing into a zip lock bag for easier application.
- Squeeze the icing from the top of the brownie triangles in a zigzag pattern to create the look of garlands on the trees.
- Decorate with your favorite sprinkles, adding star sprinkles on top for extra festive flair.
- Allow the icing to harden overnight for the best results before serving.
For an even more delightful experience, consider using buttercream frosting instead of regular icing for a sturdier finish. If you want to change things up, you can use pretzel sticks instead of candy canes for the tree trunks, or try baking the brownies in a round cake pan and cutting them into triangles.
Christmas Fudge
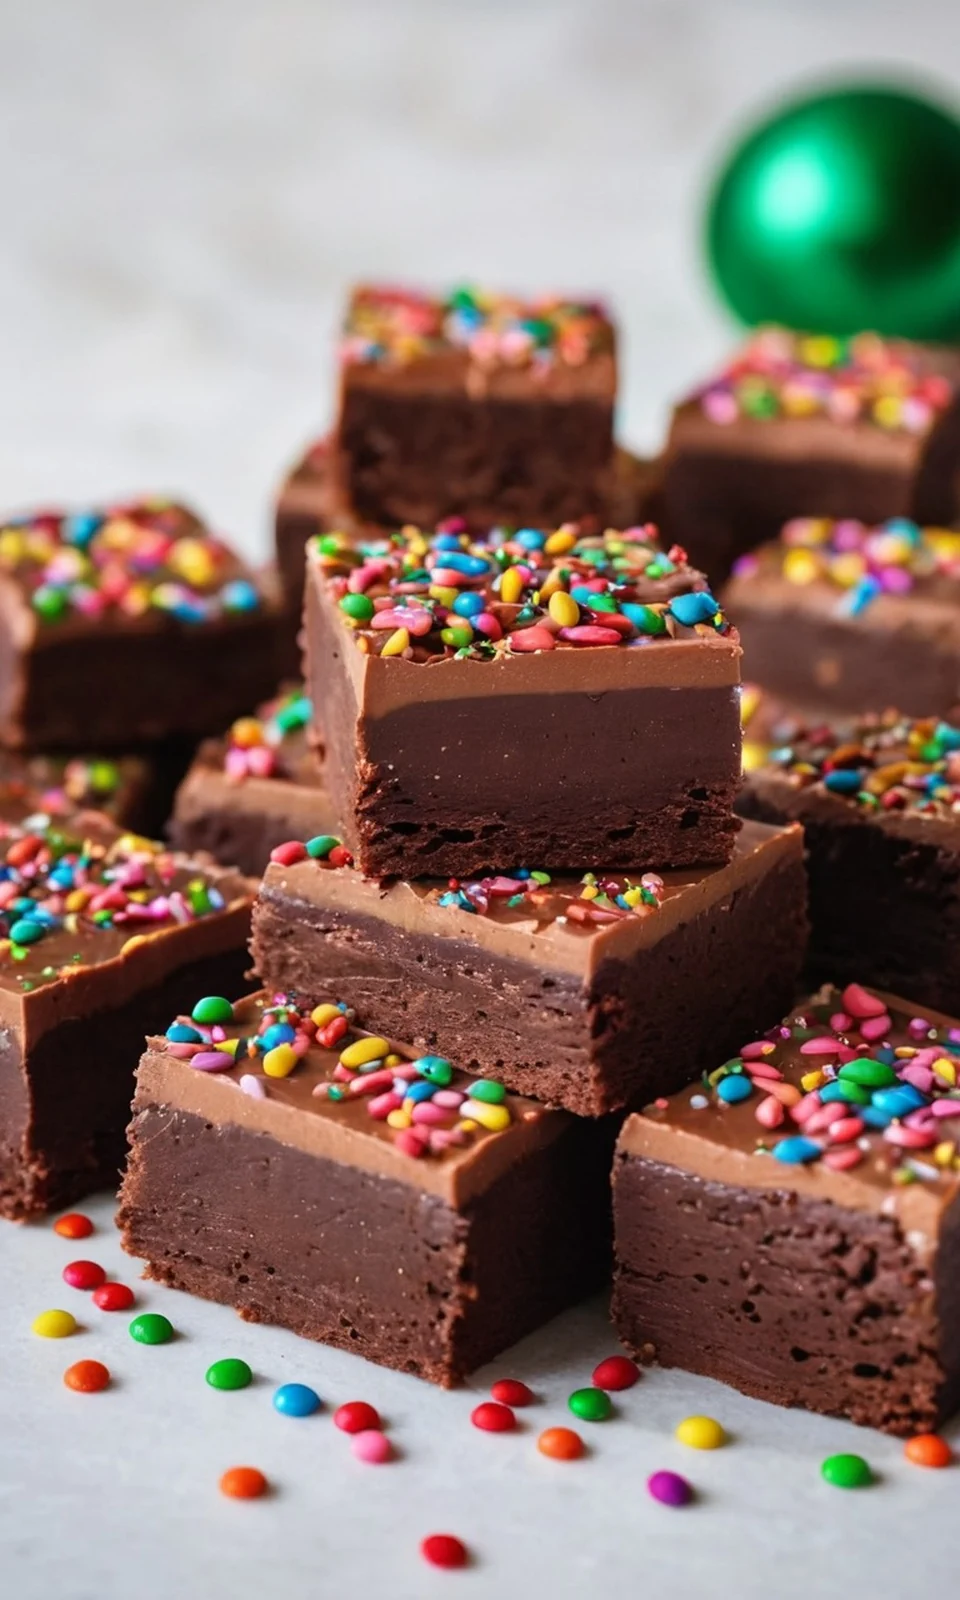
Christmas Fudge is a rich and decadent holiday treat that’s perfect for sharing with family and friends or even giving as a last-minute homemade gift. This easy-to-follow recipe yields 12 servings and features a smooth chocolate base that’s less sugary than typical fudge. With just a bit of time and a few simple ingredients, you can create a delicious batch of fudge that everyone will love!
Ingredients::
- 2 3/4 cups chocolate chips (60-70% cacao)
- 14-ounce can of sweetened condensed milk
- 4 tablespoons unsalted butter (cubed)
- 2 tablespoons heavy cream
- 1 teaspoon pure vanilla extract
- 1/4 teaspoon kosher salt
- Festive sprinkles for decoration
Instructions::
- Begin by lining an 8×8 baking pan with parchment paper and greasing it with cooking spray.
- In a medium saucepan, combine the chocolate chips, sweetened condensed milk, butter, heavy cream, vanilla extract, and kosher salt.
- Place the saucepan over medium heat and stir constantly until the mixture is melted and smooth, which should take about 5 minutes.
- Once melted, pour the fudge mixture into the prepared baking pan, spreading it evenly.
- Top with festive sprinkles or your choice of toppings.
- Refrigerate the fudge until it’s set, which will take approximately 2 hours.
- Once set, cut the fudge into squares and enjoy!
For the best results, make sure to stir the mixture constantly while it’s on the stovetop. This will help achieve a smooth texture without any graininess. If you’re feeling creative, try different toppings like colorful sprinkles, nuts, or even flaky sea salt to give your fudge a unique twist. Remember to store any leftovers in an airtight container in the fridge, where they’ll stay fresh for up to 3 weeks.
Gingerbread Latte Cupcakes
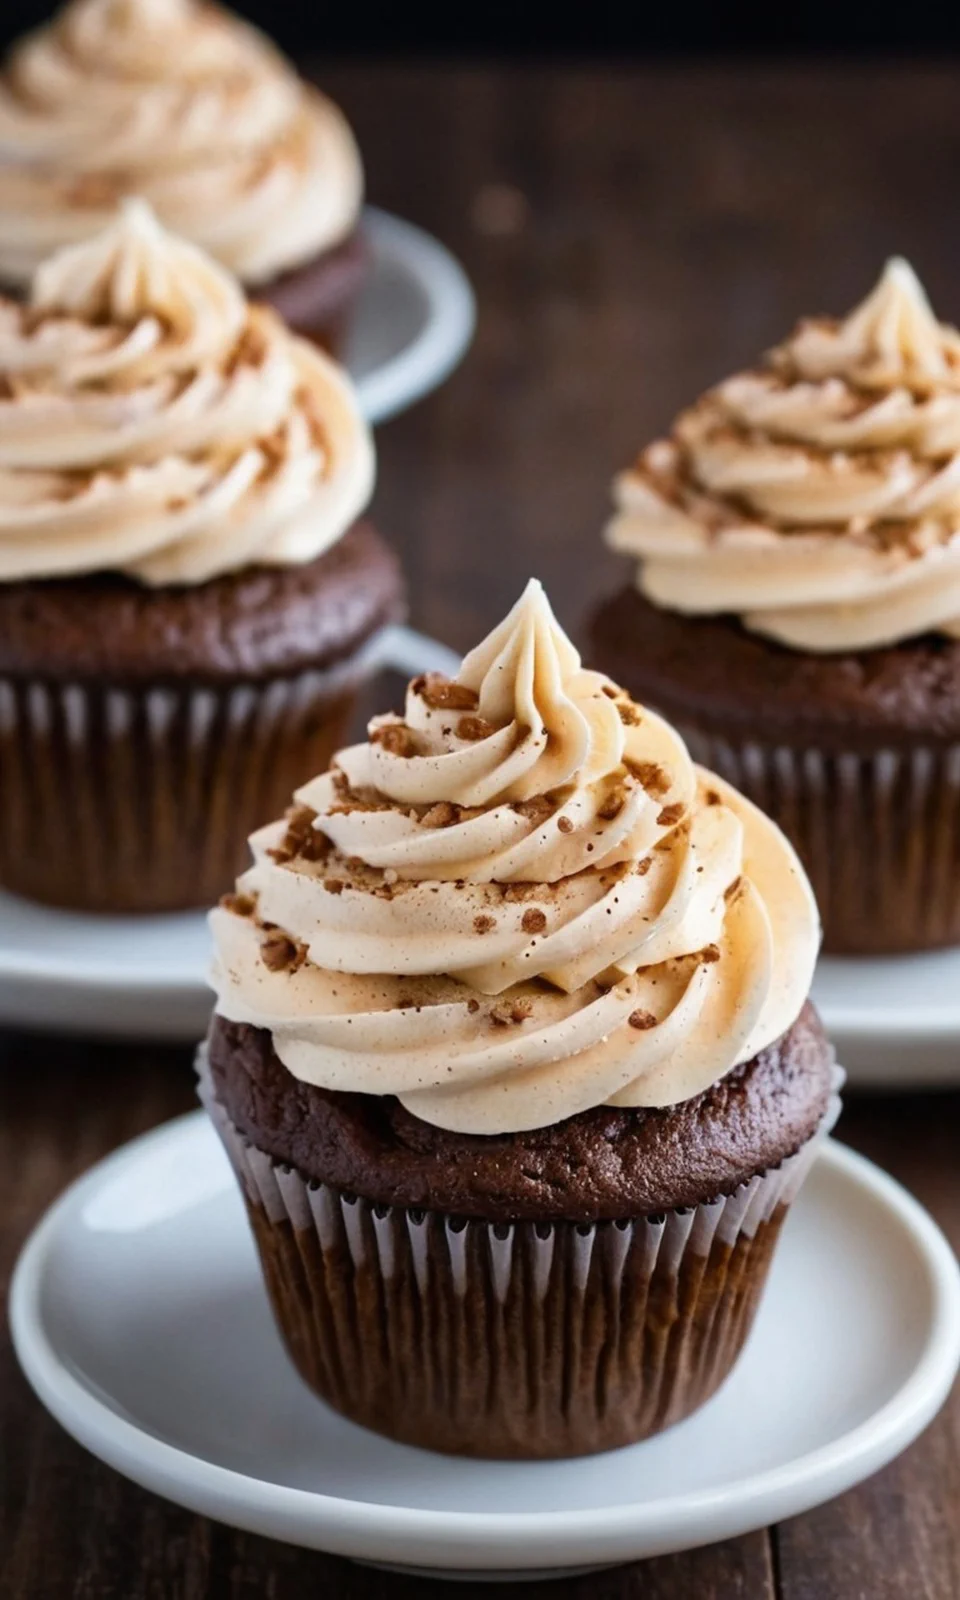
Gingerbread Latte Cupcakes are a delicious treat that perfectly captures the flavors of the holiday season. With the rich taste of mocha, warm ginger, and a hint of cinnamon, these cupcakes are moist and not too sweet. Topped with a thick and fluffy cream cheese frosting that has a touch of fresh lemon, they’re sure to impress at any holiday gathering.
Ingredients::
- 1 ½ cups all-purpose flour
- 1 tsp baking powder
- ½ tsp baking soda
- 1 tsp ground cinnamon
- 1 tsp ground ginger
- ¼ tsp ground nutmeg
- ¼ tsp salt
- ½ cup unsalted butter, melted
- 1 tablespoon fresh ginger, grated
- 1 cup strong brewed coffee (hot)
- ½ cup molasses
- ¾ cup brown sugar
- 2 large eggs
Cream Cheese Frosting:
- 8 oz cream cheese, softened
- ½ cup unsalted butter, softened
- 4 cups confectioners’ sugar
- ¼ tsp salt
- 2 tablespoons lemon juice
- Zest of 1 lemon
Instructions::
- Preheat your oven to 350°F (175°C) and line a muffin tin with paper liners.
- In a bowl, sift together the flour, baking powder, baking soda, cinnamon, ginger, nutmeg, and salt.
- In another bowl, mix the melted butter, grated ginger, and hot coffee. Add the molasses and brown sugar, stirring until well combined.
- Beat in the eggs one at a time until fully blended.
- Gradually add the flour mixture to the wet ingredients, mixing until just combined.
- Fill each muffin liner about two-thirds full with the batter.
- Bake for 14-16 minutes, or until a toothpick inserted in the center comes out clean. Let them cool before frosting.
When making these Cupcakes, make sure to use fresh ginger for the best flavor. If you want to decorate your cupcakes, gingerbread sprinkles can be found online. Remember not to open the oven door while baking, as this can cause the cupcakes to sink in the middle. Feel free to adjust the consistency of the cream cheese frosting by adding more lemon juice for tanginess or sugar for sweetness, depending on your taste.
Red Velvet Trifle
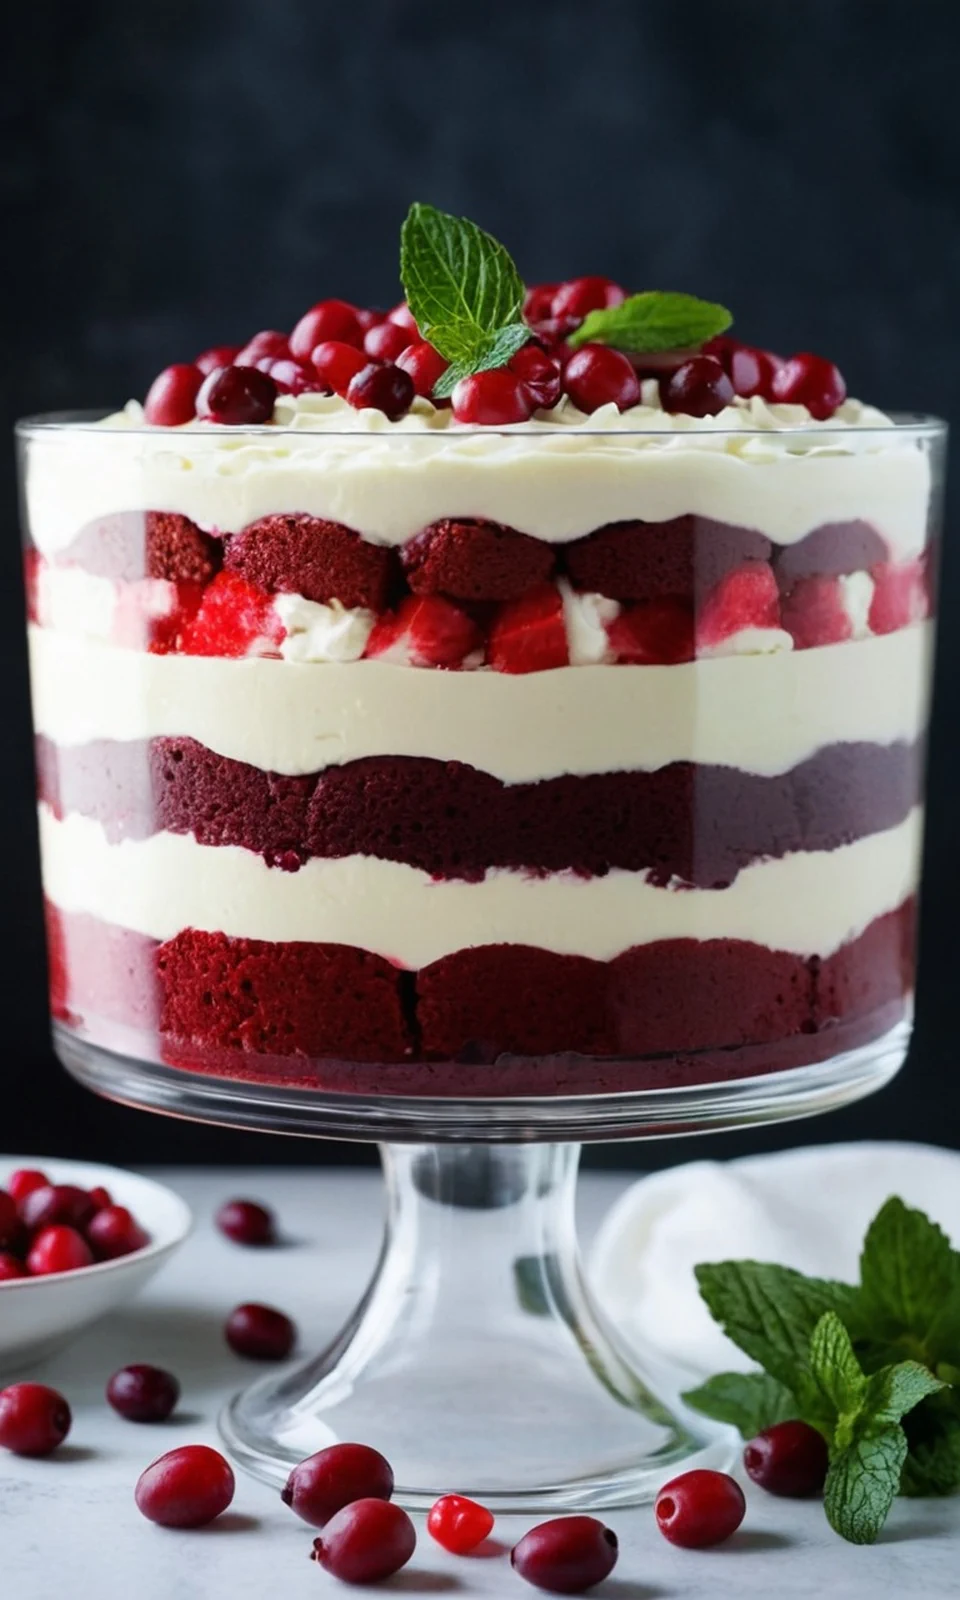
Red Velvet Trifle is a delicious and beautiful dessert that’s perfect for Christmas or any special occasion. It combines layers of moist red velvet cake, fluffy whipped cream cheese filling, and sweet cherry pie filling. This dessert not only looks impressive but also tastes amazing, making it a favorite among family and friends.
Ingredients:
- 2 cups flour
- 1 cup sugar
- 1 cup vegetable oil
- 2 large eggs
- 1 cup buttermilk
- 1 cup brewed coffee (cooled)
- 1 teaspoon vanilla extract
- 2 tablespoons red food gel
- 1 tablespoon vinegar
- 1 tablespoon cocoa powder
- 1 teaspoon baking powder
- 1 teaspoon baking soda
- 1/2 teaspoon salt
- 1 cup cold whipping cream
- 8 ounces cream cheese (softened)
- 1/2 cup sugar (for filling)
- 1/4 teaspoon salt (for filling)
- 1 teaspoon vanilla extract (for filling)
- 1 can cherry pie filling
- Optional toppings: chocolate syrup, chocolate shavings
Instructions:
- Preheat your oven to 325°F (165°C). Grease and flour two or three 9-inch cake pans.
- In a bowl, sift together the flour, cocoa powder, baking powder, baking soda, and salt.
- In another bowl, mix the sugar and oil. Then add the eggs, buttermilk, cooled coffee, vanilla extract, red food gel, and vinegar. Mix well.
- Gradually combine the wet and dry ingredients, being careful not to overmix.
- Pour the batter evenly into the prepared cake pans and bake for about 35 minutes, or until a toothpick comes out with moist crumbs.
- While the cake is baking, prepare the whipped cream cheese filling. Beat the cold whipping cream in a bowl until stiff peaks form and set aside.
- In another bowl, beat the softened cream cheese until smooth. Add sugar, salt, and vanilla extract, and mix well.
- Carefully fold the whipped cream into the cream cheese mixture until well combined.
- Once the cake has cooled, crumble it into small pieces.
- In a trifle dish or a large clear bowl, start layering: add a layer of crumbled red velvet cake, a layer of cream cheese filling, and a layer of cherry pie filling. Repeat the layers until the dish is full.
- Finish with a layer of cream cheese filling and top with cherry pie filling. Add chocolate syrup or chocolate shavings on top if you like.
- Chill the trifle in the refrigerator for about 30 minutes before serving.
For the best results, make sure your cream cheese is softened before mixing, as this will help create a smooth filling. You can also prepare the red velvet cake a day ahead and store it in the fridge until you’re ready to assemble the trifle. This dessert is perfect for sharing, and you can easily adjust the layers based on your preference for cake or filling.
Gingersnap Cheesecake Bars
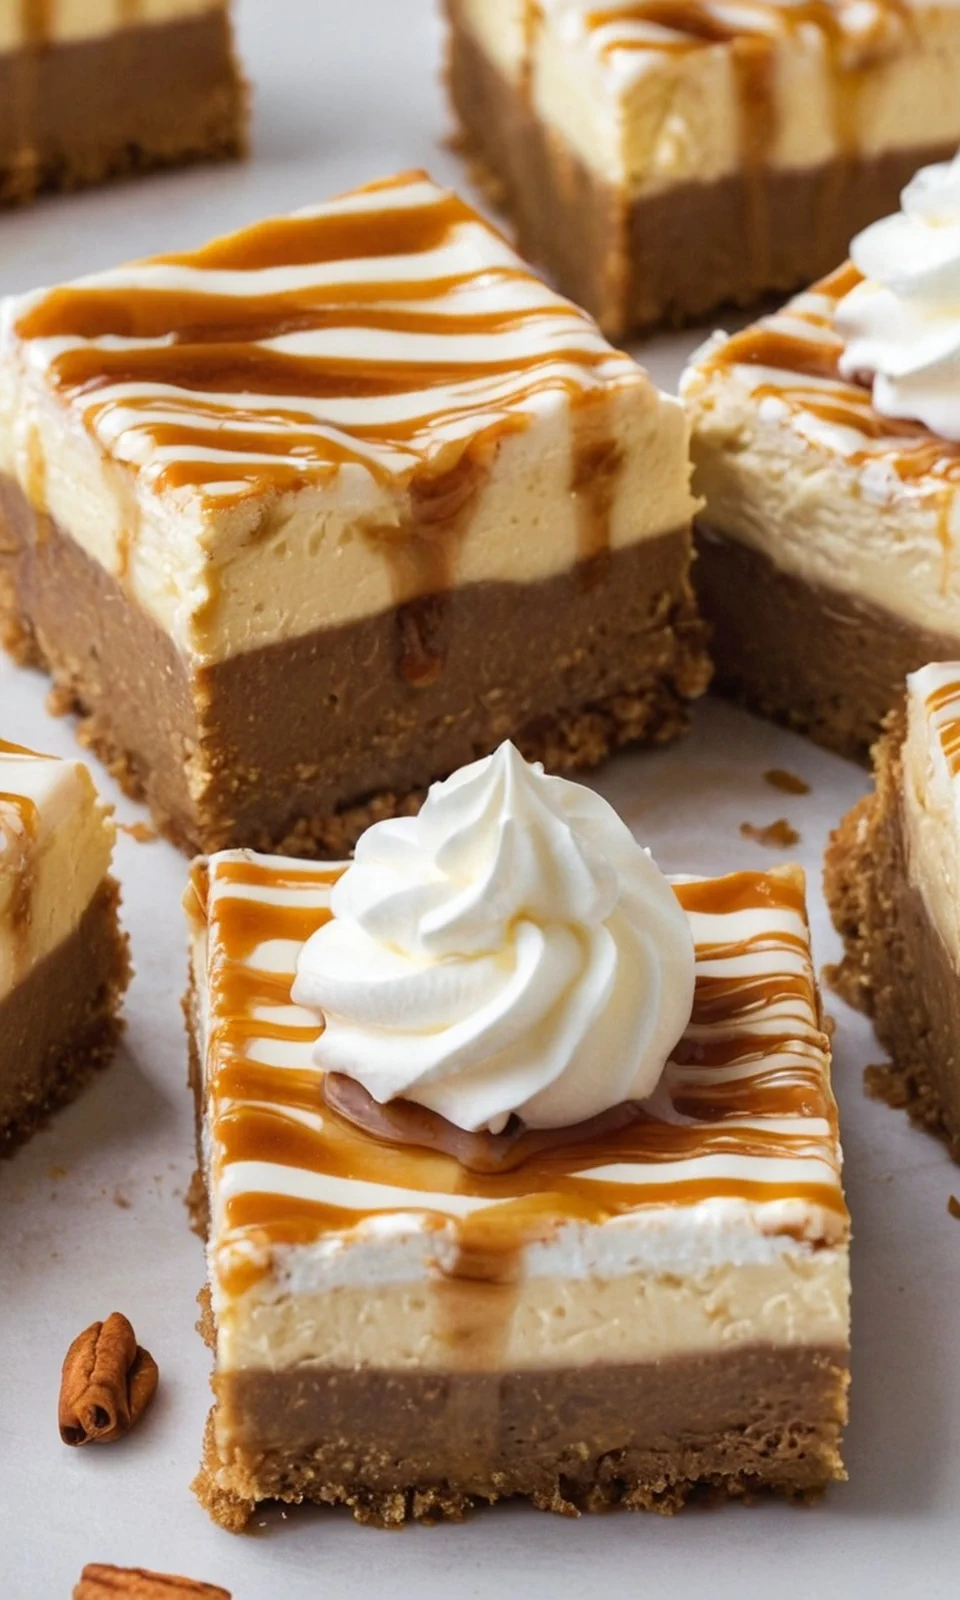
Gingersnap Cheesecake Bars are a delicious and festive treat that’s perfect for Christmas dessert tables. With a creamy filling swirled with cookie butter and a crunchy gingersnap cookie crust, these bars are easy to make and look great. They combine the warm flavors of ginger, cinnamon, and molasses, making them a delightful addition to any holiday gathering.
Ingredients:
- 1.5 cups crushed gingersnap cookies (about 25-30 cookies)
- 0.25 cup melted butter
- 32 ounces cream cheese
- 1 cup sugar
- 1 cup sour cream
- 0.5 cup cookie butter
- Eggs (for binding)
- 1 teaspoon vanilla extract
Instructions:
- Preheat your oven to 350°F (175°C).
- In a bowl, crush the gingersnap cookies into fine crumbs and mix them with the melted butter until combined.
- Press the crust mixture evenly into the bottom of a lined brownie pan.
- In a large mixing bowl, combine the cream cheese, sugar, eggs, sour cream, and vanilla extract. Mix until the mixture is smooth.
- Microwave the cookie butter for about 15-20 seconds to make it pourable.
- Pour the cream cheese mixture over the crust in the pan, then drizzle the melted cookie butter on top. Use a knife to swirl the cookie butter into the cream cheese mixture.
- Bake for 30-40 minutes, or until the cheesecake is set but still has a slight jiggle in the center.
- Once baked, let the cheesecake bars cool at room temperature for a bit, and then refrigerate them for at least 2 hours before cutting them into bars.
For extra tips, make sure to let the cheesecake bars cool completely before you cut them; this helps them hold their shape better.
You can also top them with whipped cream and crushed gingersnap cookies for added flavor and texture. If you have leftovers, store them in an airtight container in the refrigerator to keep them fresh. Enjoy these delightful treats with a warm cup of coffee or tea!
Dark Chocolate Peppermint Roll
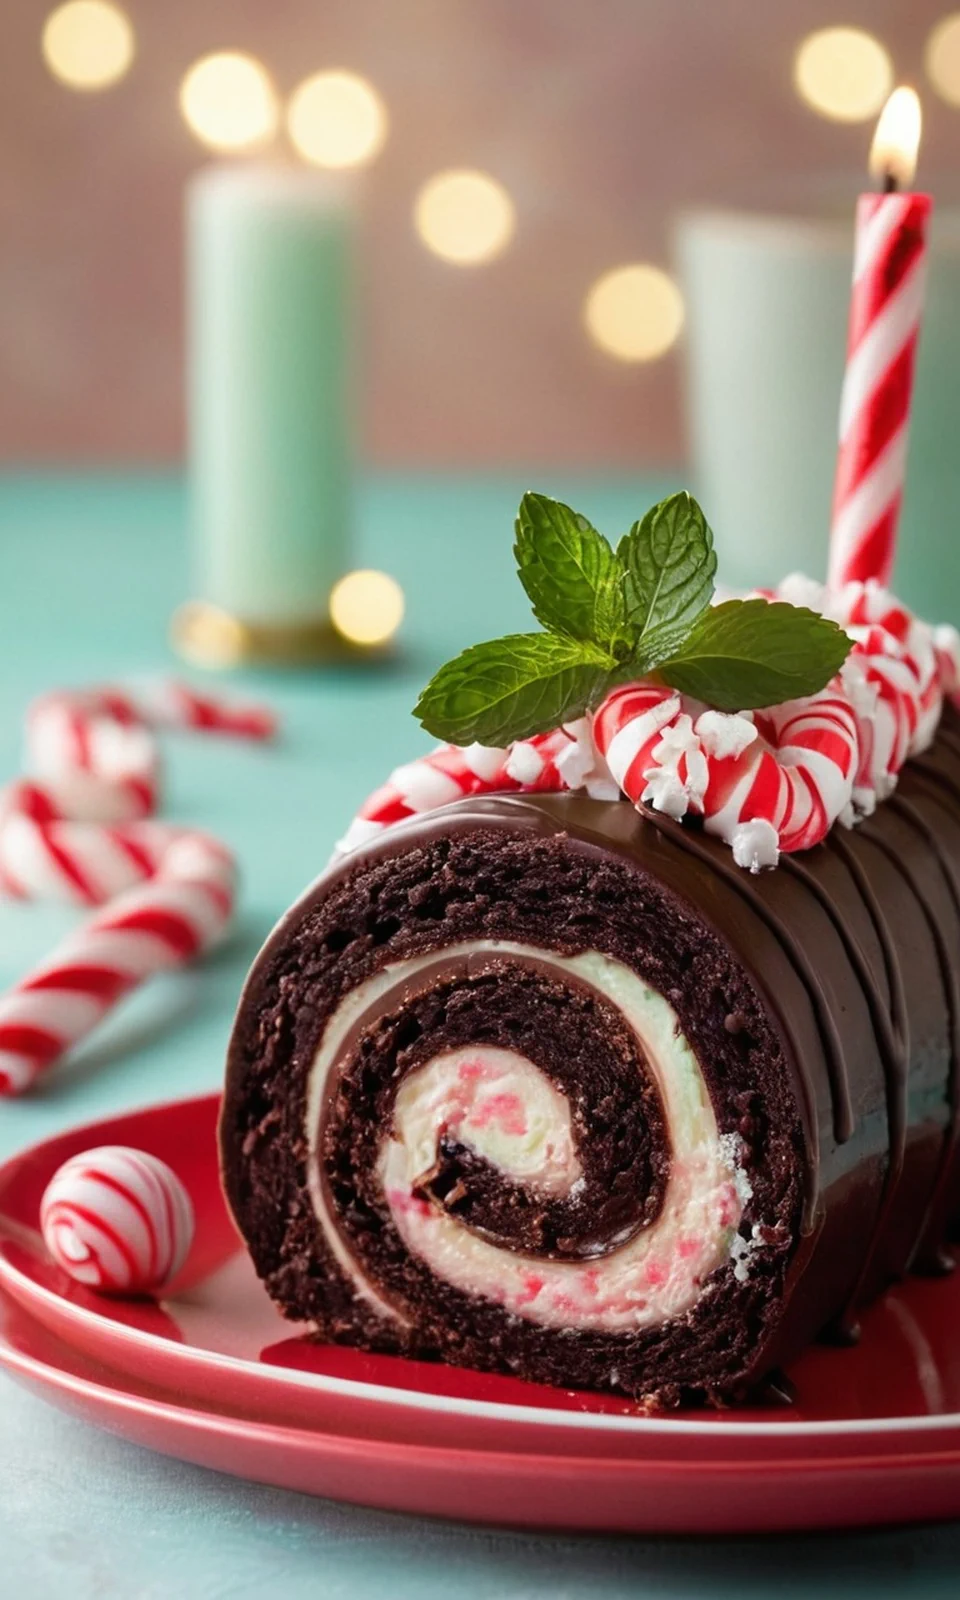
The Dark Chocolate Peppermint Roll is a delicious and festive dessert that’s perfect for holiday gatherings. This treat features a soft dark chocolate cake rolled up with a delightful peppermint chip buttercream filling, all topped with a rich chocolate glaze and sprinkled with peppermint chips. It’s sure to impress your family and friends with its beautiful presentation and balanced flavors!
Ingredients:
- 4 eggs
- 1 cup sugar
- 1/4 teaspoon salt
- 1/4 cup oil
- 1/2 cup buttermilk
- 1 cup flour
- 1/2 cup cocoa powder
- 1 teaspoon baking powder
- 1/2 cup butter (for buttercream)
- 4 cups powdered sugar (for buttercream)
- 1/2 cup peppermint chips (for buttercream)
- 2 tablespoons milk (for buttercream)
- 1 cup chocolate chips (for glaze)
- 1/2 cup heavy cream (for glaze)
- 1 teaspoon vanilla (for glaze)
- 1/4 cup powdered sugar (for glaze)
- 2 tablespoons warm water (for glaze)
- Optional: peppermint extract
- Additional peppermint chips for garnish
Instructions:
- Preheat your oven to 350°F. Grease and flour a jelly roll pan, then line it with parchment paper.
- In a large bowl, whisk together the eggs, sugar, and salt until the mixture is frothy. Then mix in the oil and buttermilk.
- In another bowl, sift together the flour, cocoa powder, and baking powder. Gradually combine this dry mixture with the wet ingredients until everything is well mixed.
- Pour the batter into the prepared jelly roll pan and spread it evenly. Bake for about 15 minutes, or until a toothpick inserted in the center comes out clean.
- Once done, take the cake out of the oven and let it cool for about 5 minutes. Then, carefully roll the warm cake in a powdered sugar-dusted kitchen towel and let it cool completely.
- After the cake has cooled, unroll it gently and spread the peppermint buttercream evenly over the top.
- Roll the cake back up tightly into a spiral and place it on a wire rack set over a baking sheet.
- To make the chocolate glaze, heat the chocolate chips and heavy cream together until melted. Stir in the vanilla, powdered sugar, and warm water until smooth.
- Pour the chocolate glaze over the rolled cake, allowing it to drip down the sides. Sprinkle additional peppermint chips on top.
- Let the chocolate glaze set for a bit before slicing and serving.
For the best results, remember to dust your kitchen towel with powdered sugar to prevent the cake from sticking when you roll it. If you want a stronger peppermint flavor, you can add some peppermint extract to the buttercream. Make sure the glaze is semi-thick for better draping on the cake. Finally, this dessert can be stored at room temperature or in the fridge, so you can prepare it ahead of time for your holiday celebrations!
Easy Berry Pavlova
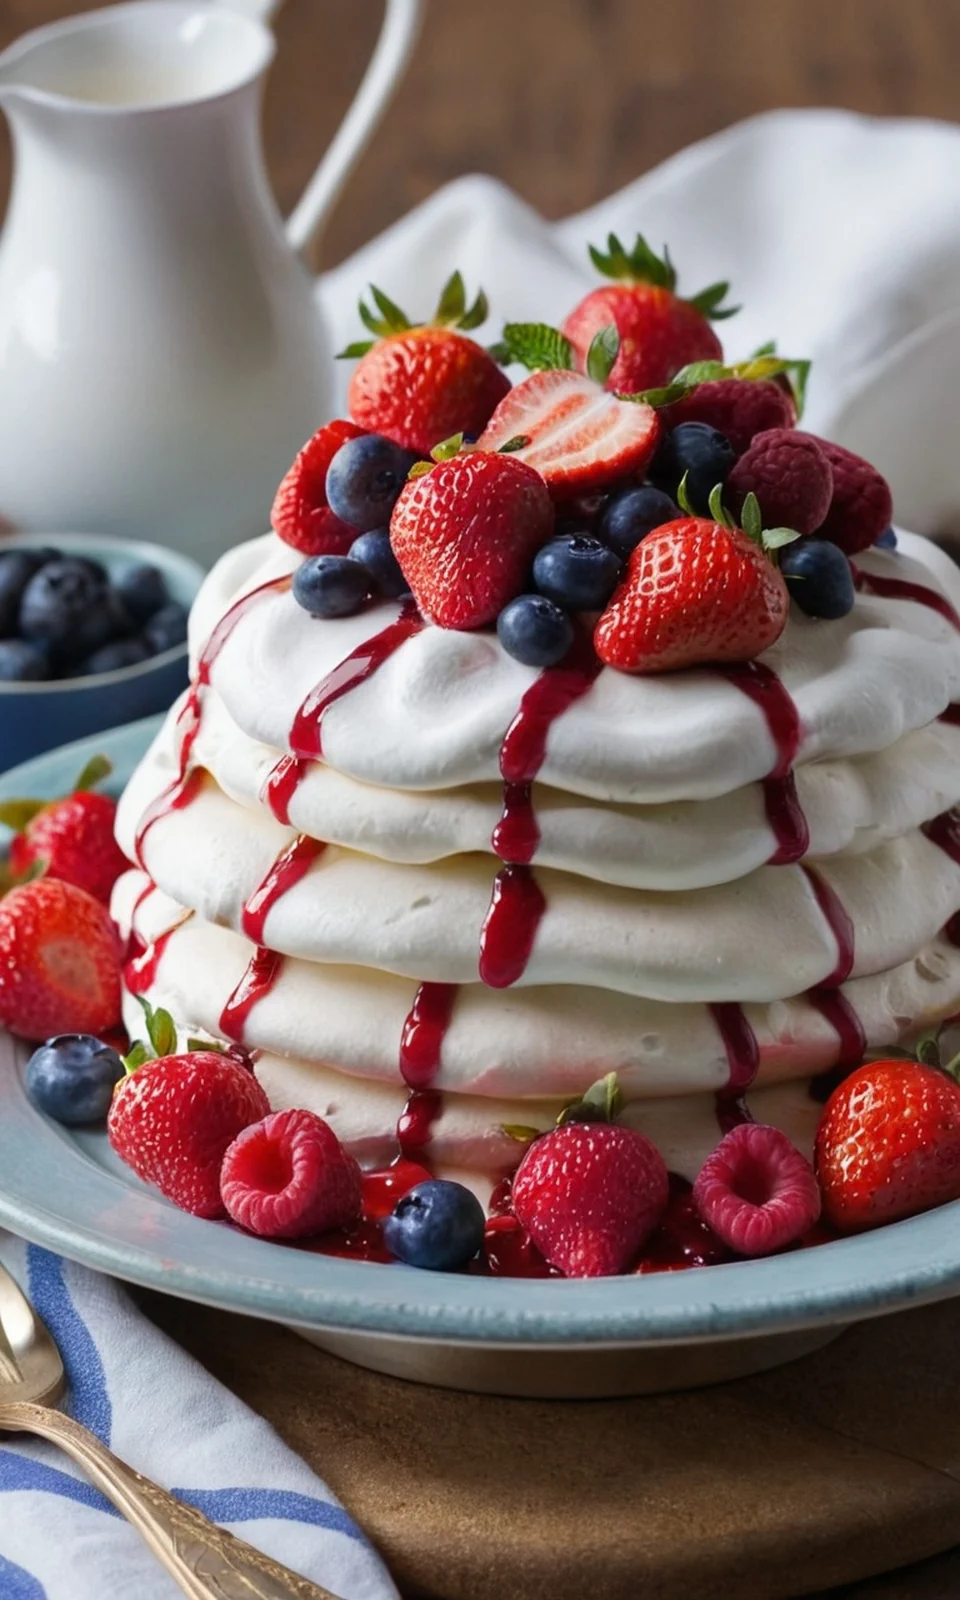
Pavlova is a delicious dessert that combines a crispy meringue shell with creamy filling and fresh berries. It’s perfect for special occasions like Christmas or any festive gathering. With its sweet and elegant presentation, this dessert is sure to impress your family and friends!
Ingredients:
- 4 egg whites
- 1 cup sugar
- 1 teaspoon vinegar
- 1 teaspoon vanilla extract
- 1 cup pastry cream (or whipped cream)
- Fresh berries (strawberries, blueberries, raspberries)
- Optional: extra meringue for decoration
Instructions:
- Preheat your oven to 150°C (300°F) and place the oven rack in the middle.
- On a piece of greaseproof paper, trace a 30 cm circle. This will help shape your meringue.
- In a bowl, beat the egg whites until they’re foamy. Gradually add the sugar, continuing to beat until stiff peaks form.
- Add the vinegar and vanilla extract, and briefly mix to combine.
- Spoon the meringue mixture onto the traced circle, spreading it out to fill the shape.
- Bake the meringue in the preheated oven at 110°C (240°F) for 1.5 hours.
- Once done, turn off the oven and leave the meringue inside to cool completely with the door slightly ajar.
- After the meringue has cooled, place it on a serving plate and spread the pastry cream on top.
- Decorate with fresh berries and, if desired, pipe extra meringue into small circles for decoration.
- Serve immediately for the best taste and texture.
For the best results, make sure no egg yolk gets in the egg whites, as this can prevent the meringue from rising properly. Beat the egg whites until they’re just right—not too dry—so they hold their shape well. When adding sugar, do it slowly to keep the meringue fluffy. You can also experiment with different fruits and creams for your toppings, making this dessert unique every time you make it!
Salted Pretzel and Caramel Fudge
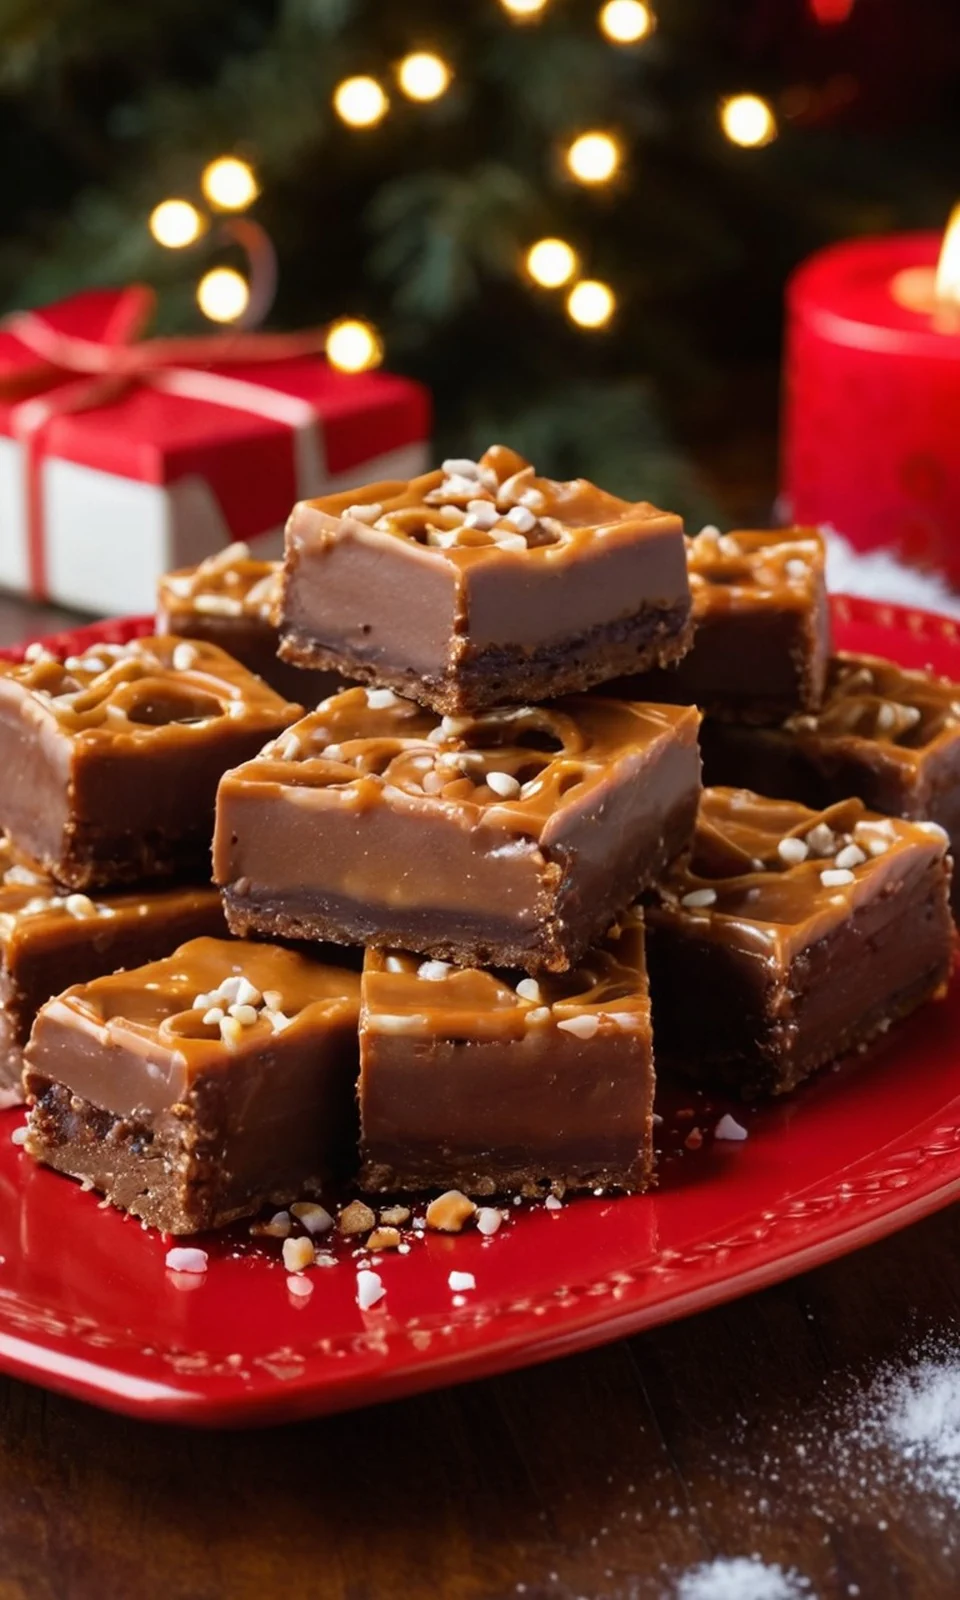
Salted Pretzel and Caramel Fudge is a delicious treat that combines the sweet and salty flavors we all love. With the crunchy texture of pretzels and the smooth richness of caramel, this fudge is sure to be a hit at any gathering. It’s easy to make, and before you know it, you’ll have a tray of mouthwatering fudge that everyone will want to try!
Ingredients:
- 2 cups crushed pretzels
- 1 cup sweetened condensed milk
- 2 cups chocolate chips (milk or dark)
- 1 cup caramel sauce
- 1/2 cup chopped nuts (optional)
- Sea salt for sprinkling
Instructions:
- Begin by lining a square baking pan with parchment paper for easy removal of the fudge.
- In a double boiler, melt the chocolate chips over low heat, stirring occasionally until smooth.
- Once melted, remove the chocolate from heat and mix in the sweetened condensed milk until fully combined.
- Fold in the crushed pretzels carefully, making sure they’re evenly coated with the chocolate mixture.
- Pour half of the fudge mixture into the prepared baking pan and spread it out evenly.
- Drizzle half of the caramel sauce over the fudge layer and sprinkle with a pinch of sea salt.
- Pour the remaining fudge mixture on top and spread it out gently.
- Drizzle the rest of the caramel sauce over the top and sprinkle with chopped nuts (if using) and more sea salt.
- Refrigerate the fudge for about 2-3 hours until it’s firm.
- Once set, remove the fudge from the pan using the parchment paper and cut it into squares.
For the best results, remember to let the fudge cool completely before cutting it into pieces. You can also get creative by trying different types of chocolate or adding your favorite toppings. If you want to make it extra special, serve it alongside other caramel-themed desserts for a fun dessert spread!
Chocolate Covered Pretzels
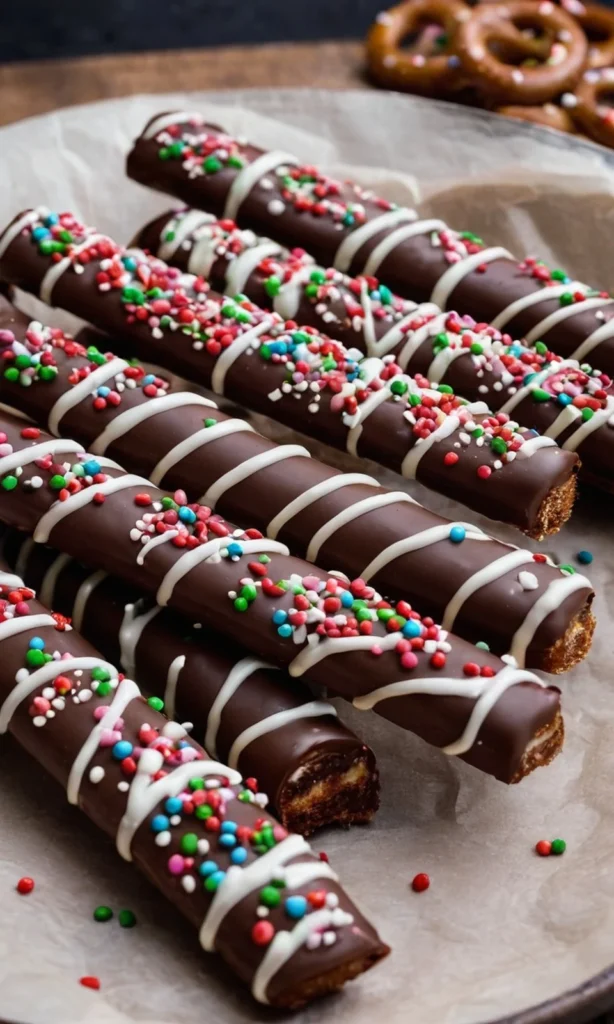
Chocolate-covered pretzels are a delicious and festive treat that’s perfect for holiday gatherings or as a sweet gift for friends and family. They’re easy to make and can be customized with your favorite toppings. With just a few simple ingredients and steps, you can create a delightful snack that looks as good as it tastes!
Ingredients:
- Sturdy pretzel rods (like Utz Pretzel Rods)
- High-quality chocolate (dark, milk, or white)
- Shortening (for milk or white chocolate, optional)
- Sprinkles or other toppings (nuts, crushed candies, sea salt)
Instructions:
- Prepare your workspace by laying out parchment paper on a baking sheet for the pretzels to set on.
- Melt the chocolate according to the package instructions. You can do this in a microwave-safe bowl in short intervals or by using a double boiler.
- If using milk or white chocolate, you can add a little shortening to make it smoother.
- Once melted, pour the chocolate into a tall glass to make dipping easier.
- Dip each pretzel rod halfway into the melted chocolate, ensuring even coverage.
- Immediately decorate with sprinkles or any other toppings you like before the chocolate hardens.
- Place the dipped pretzels on the parchment paper and let them set until the chocolate hardens completely.
For best results, make sure your pretzels are dry and free from moisture before dipping them in chocolate. Avoid overheating the chocolate, as this can cause it to become thick and clumpy. When storing your chocolate-covered pretzels, keep them in an airtight container in a cool, dry place to maintain their freshness and crispiness. You can also wrap them individually for gifting or display them on decorative platters for a festive touch!
Cranberry and Rosemary Cupcakes
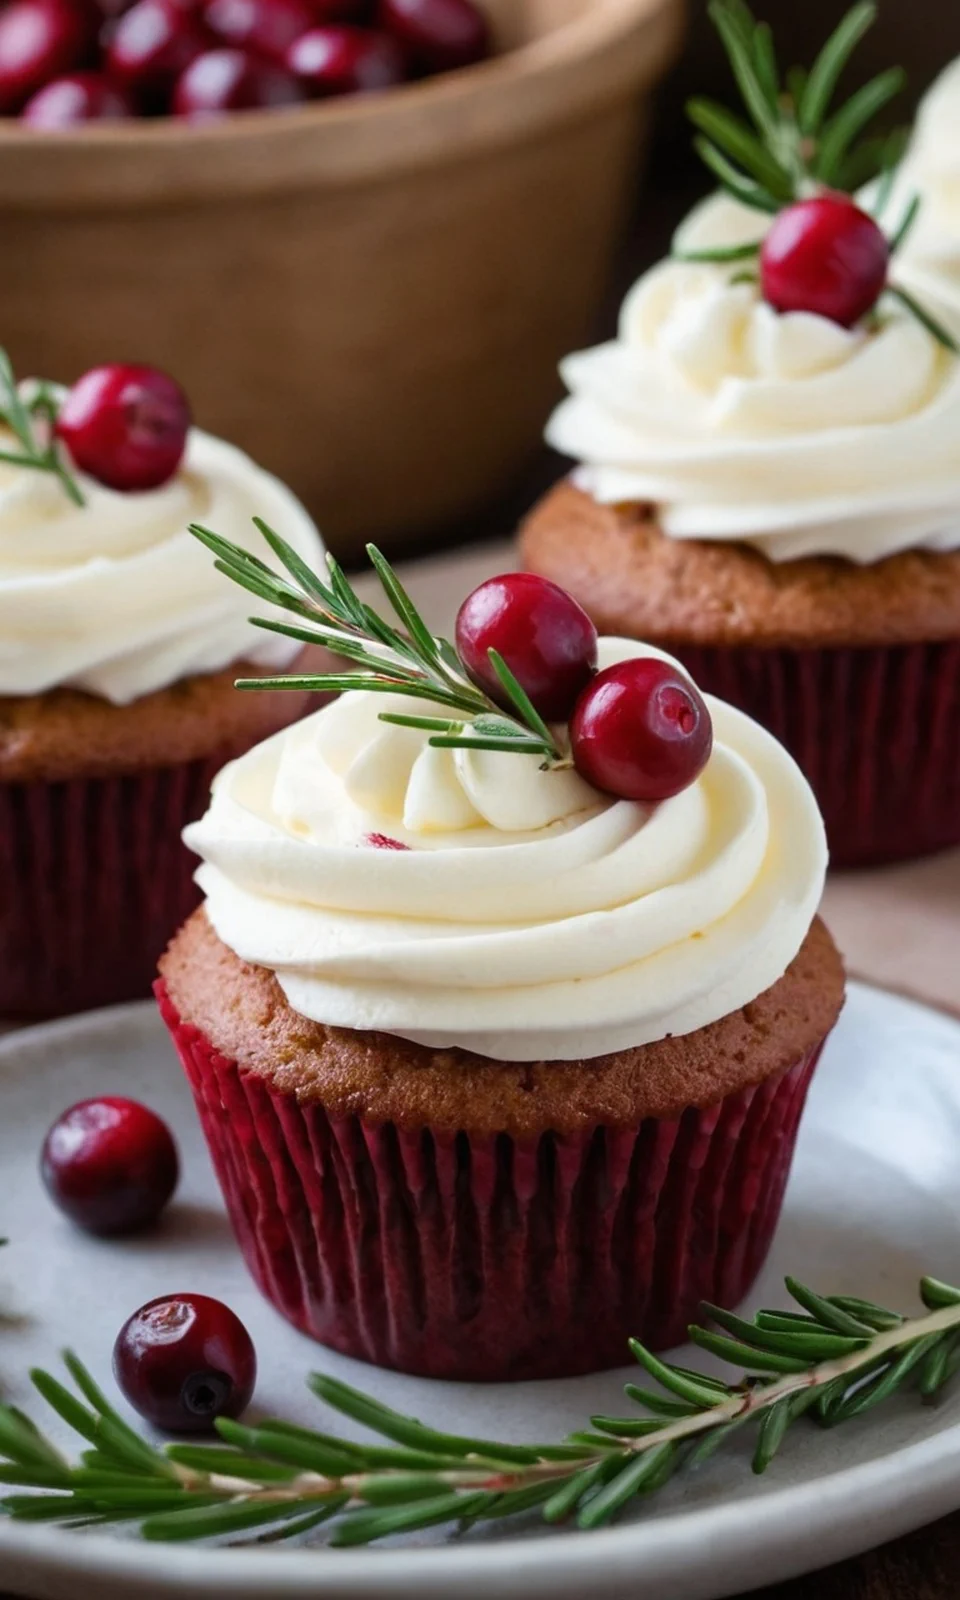
These Cranberry and Rosemary Cupcakes are a delightful holiday treat that will impress your guests with their festive appearance and delicious taste. Topped with sugared cranberries and fresh rosemary, these cupcakes are perfect for any holiday gathering. They’re easy to make and will add a charming touch to your dessert table.
Ingredients:
- 1 package vanilla cake mix
- 12 oz cranberries
- 2 cups sugar
- ½ cup water
- Homemade buttercream frosting (recipe below)
- Fresh rosemary sprigs for decoration
Instructions:
- Preheat your oven according to the instructions on the vanilla cake mix package.
- Prepare the cake mix according to the package instructions and fill cupcake liners in a muffin tin with the batter.
- Bake the cupcakes in the preheated oven for the time specified on the cake mix package, usually around 12 minutes, or until a toothpick inserted in the center comes out clean.
- While the cupcakes bake, prepare the sugared cranberries. In a small saucepan, combine ½ cup water and ½ cup sugar. Heat over medium heat until the sugar dissolves.
- Remove the saucepan from the heat and add the cranberries, coating them in the sugar mixture. Let them dry on parchment paper for about 1 hour.
- After drying, roll the cranberries in the remaining sugar to give them a sugary coating.
- Make your homemade buttercream frosting. (You can use a simple recipe: beat together 1 cup of softened butter, 4 cups of powdered sugar, 2 tablespoons of milk, and 1 teaspoon of vanilla extract until creamy.)
- Once the cupcakes are cool, frost them generously with the homemade buttercream frosting.
- Decorate each cupcake with the sugared cranberries and a few sprigs of fresh rosemary.
When making these cupcakes, make sure to allow them to cool completely before frosting to prevent the frosting from melting. If you want to save time, you can use a store-bought vanilla cake mix and ready-made buttercream frosting. For a fun twist, consider adding a little vanilla extract or almond extract to the frosting for added flavor.
Chocolate Covered Peanut Butter Crackers
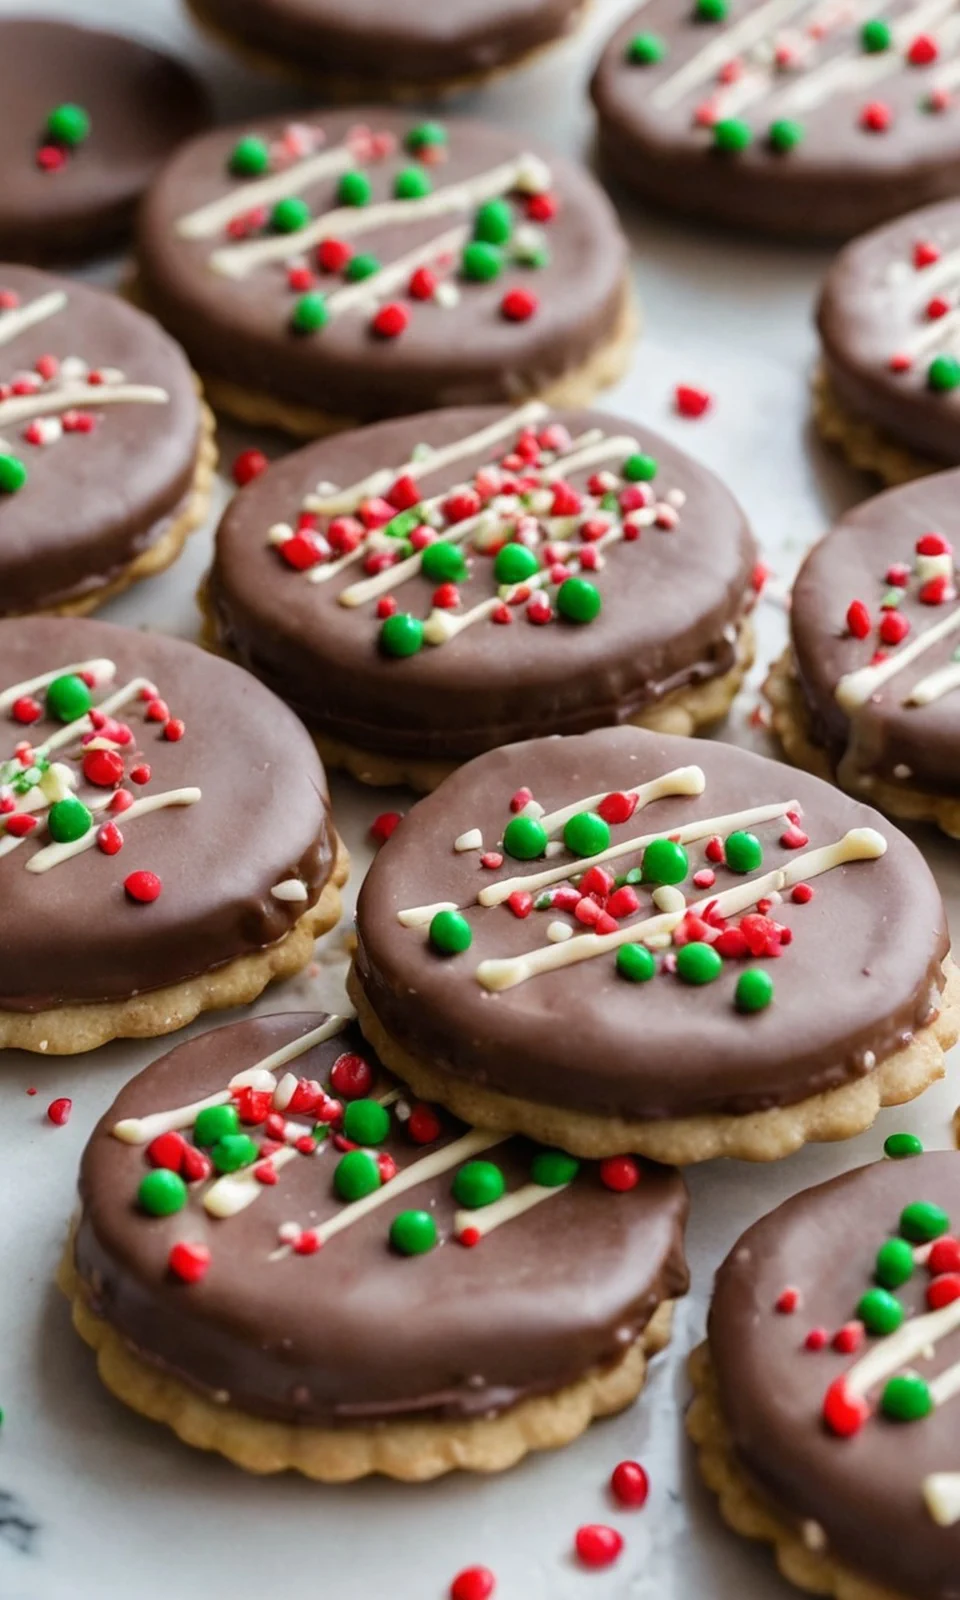
These Chocolate Covered Peanut Butter Crackers are a delicious and easy treat to make, especially during the holiday season. Combining the creamy taste of peanut butter with the sweet crunch of chocolate and a hint of salt from the crackers, these snacks are perfect for parties, gifts, or just a tasty snack at home.
Ingredients:
- 48 Ritz Crackers
- 1/2 cup Peanut Butter
- 16 oz Melting Chocolate
- Holiday Sprinkles (optional)
Instructions:
- Line a cookie sheet with wax paper to prepare for the crackers.
- Take 12 Ritz Crackers and spread 1 teaspoon of peanut butter on the salted side of each.
- Place another cracker on top of each peanut butter spread cracker, making sure the salted sides are facing the peanut butter.
- Freeze the assembled cracker sandwiches for 5 minutes to help them set.
- While the crackers are freezing, melt the chocolate in the microwave. Heat it for 30 seconds at a time, stirring in between, until it’s fully melted.
- Once the crackers are ready, dip each cracker sandwich into the melted chocolate, making sure to coat both sides.
- Shake off any excess chocolate and place the coated crackers back on the prepared cookie sheet.
- If desired, sprinkle holiday sprinkles on top of the chocolate before it sets.
- Allow the chocolate to set at room temperature or place the sheet in the refrigerator to speed up the process.
For extra tips, make sure to keep the melted chocolate warm while you work to prevent it from hardening. If you want to get creative, consider using different types of chocolate, like white chocolate or milk chocolate, for a variety of flavors. Also, feel free to mix in some chopped nuts or other toppings along with the holiday sprinkles for added texture and flavor.
Classic English Toffee
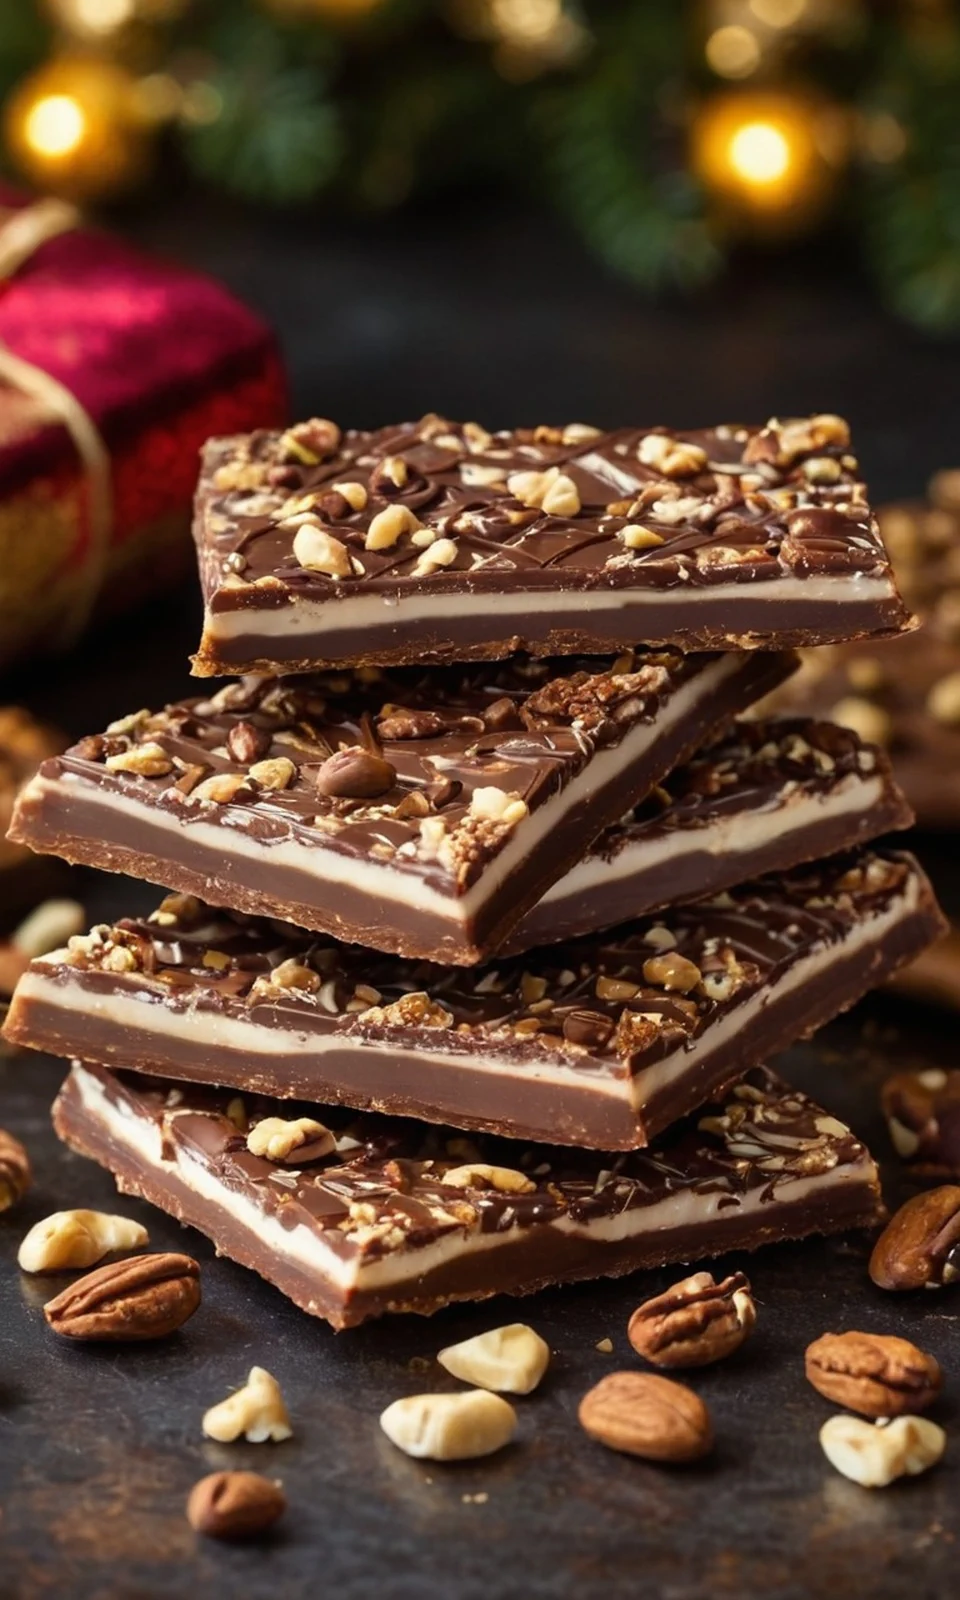
Making Classic English Toffee is a delightful and rewarding process that results in a crunchy, sweet treat perfect for sharing during the holidays or enjoying yourself. This recipe is easy to follow and guarantees a delicious outcome every time. With just a few simple ingredients and some careful cooking, you can create a batch of toffee that will impress family and friends alike.
Ingredients:
- 1 cup sugar
- 1 cup unsalted butter
- 3 tablespoons water
- 1 tablespoon corn syrup
- 1 cup chopped pecans (toasted)
- 1 cup semisweet chocolate chips (Ghirardelli recommended)
- 1 teaspoon pure vanilla extract
Cooking Instructions:
- In a heavy saucepan, combine the sugar, butter, water, and corn syrup. Heat over medium-high heat until the mixture comes to a boil, stirring occasionally.
- Once boiling, attach a candy thermometer to the side of the pan and continue to cook without stirring until the temperature reaches 290°F (hard crack stage).
- Remove the saucepan from the heat and stir in the vanilla extract and toasted pecans. Be careful, as the mixture will bubble.
- Quickly pour the toffee onto a parchment-lined baking sheet, spreading it out evenly with an offset spatula or by tilting the pan.
- Allow the toffee to cool for a few minutes, then sprinkle the chocolate chips on top. Let them sit for a minute to melt, then spread the melted chocolate evenly across the surface.
- Once the chocolate has set slightly, you can cut or break the toffee into pieces. Allow it to cool completely before storing or gifting.
When making toffee, it’s crucial to keep an eye on the temperature as it approaches 290°F, stirring gently to avoid burning the nuts. Using a digital candy thermometer will help guarantee accuracy. Avoid making toffee on humid days, as moisture can cause it to become sticky. If you want to experiment, try using different nuts or chocolate types for unique flavors. Finally, remember that patience is key; rushing the cooling process can lead to uneven texture.
Vanilla Peppermint Hot Cocoa Sticks
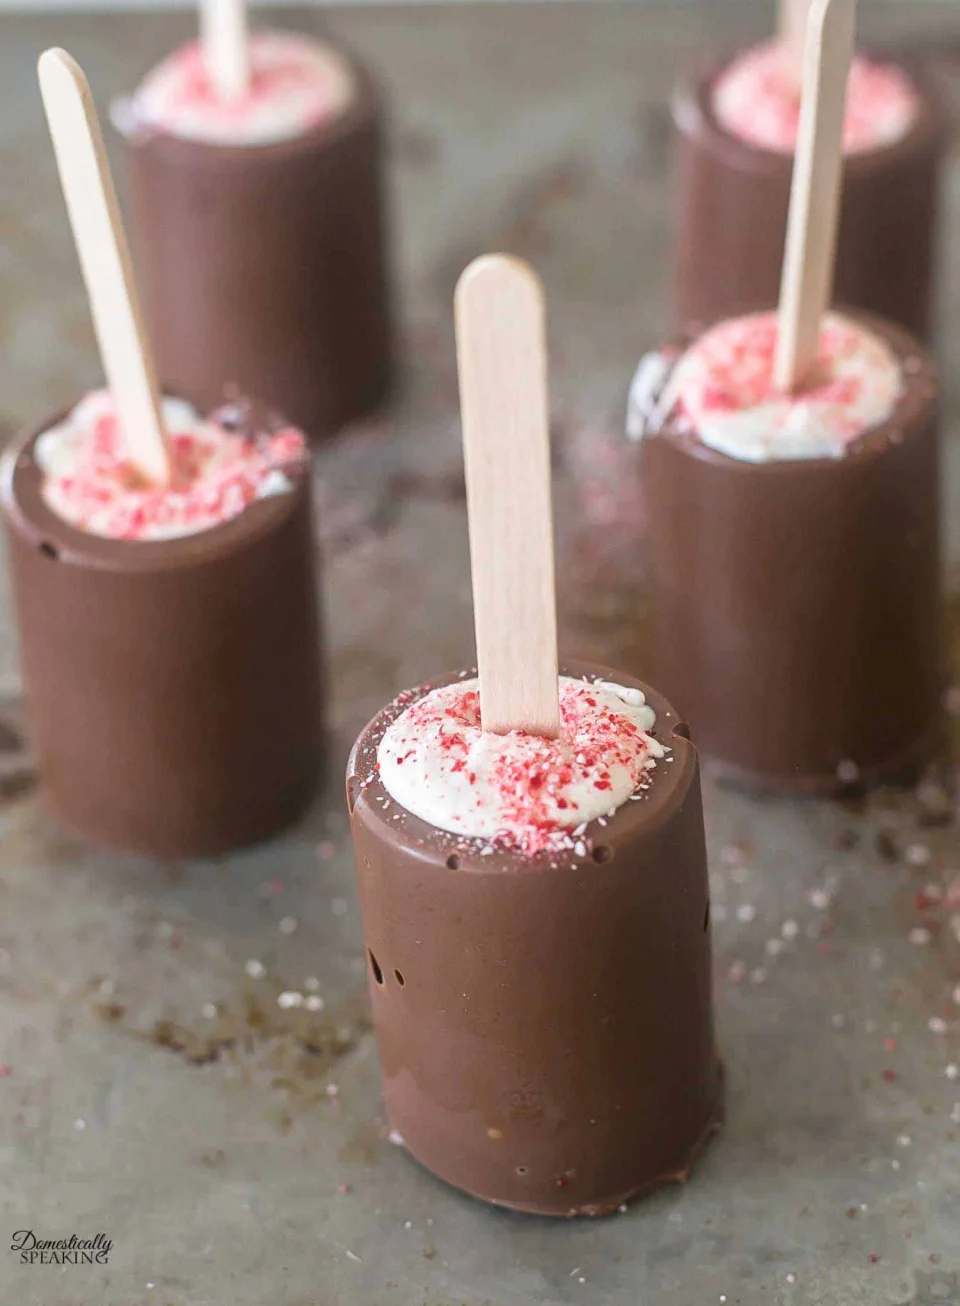
If you’re looking for a fun and delicious way to enjoy hot cocoa, try making Vanilla Peppermint Hot Cocoa Sticks! These adorable chocolate sticks are perfect for stirring into warm milk or water, creating a delightful drink filled with rich chocolate and a hint of peppermint. They make great gifts or festive treats for yourself and your loved ones during the holiday season.
Ingredients:
- 2 cups melting milk chocolate
- 2 cups melting vanilla chocolate (or white chocolate)
- 1 tablespoon crushed peppermint
- Popsicle sticks for handles
- Shot glass silicone molds for shaping
Instructions:
- Begin by melting the milk chocolate. Place it in a heat-safe bowl and microwave it for 30 seconds. Stir, then continue microwaving in 15-30 second increments until the chocolate is completely melted.
- Carefully pour the melted milk chocolate into the shot glass silicone molds, filling them about halfway. Place the molds in the freezer until the chocolate is set.
- While the milk chocolate is setting, melt the vanilla chocolate using the same method as before. Once melted, mix in the crushed peppermint.
- Take the shot glass molds with the milk chocolate out of the freezer. Pour the melted vanilla mixture into the center of each milk chocolate shot glass. Insert a Popsicle stick into each one and refrigerate or freeze until firm.
- Once the chocolate sticks are fully set, they’re ready to use! Simply place a stick in a mug and add 6-8 ounces of hot milk or water. Stir until melted and enjoy your Vanilla Peppermint Hot Cocoa!
When making these hot cocoa sticks, make sure that your chocolate melts smoothly to avoid any lumps. You can also get creative with flavors by adding mini chocolate chips or marshmallows before pouring in the white chocolate. If you want to make them extra special for gifts, package them in small cellophane bags with a pretty ribbon and include instructions on how to use them.
Other Festive Christmas Dessert Recipes
Christmas Sugar Cookies with Royal Icing

These cookies, soft and buttery, are the perfect canvas for your creativity. With a sprinkle of colorful sprinkles and a swirl of royal icing, you can transform simple dough into delightful Christmas sweets and treats that everyone adores.
Mini Santa Hat Cheesecakes
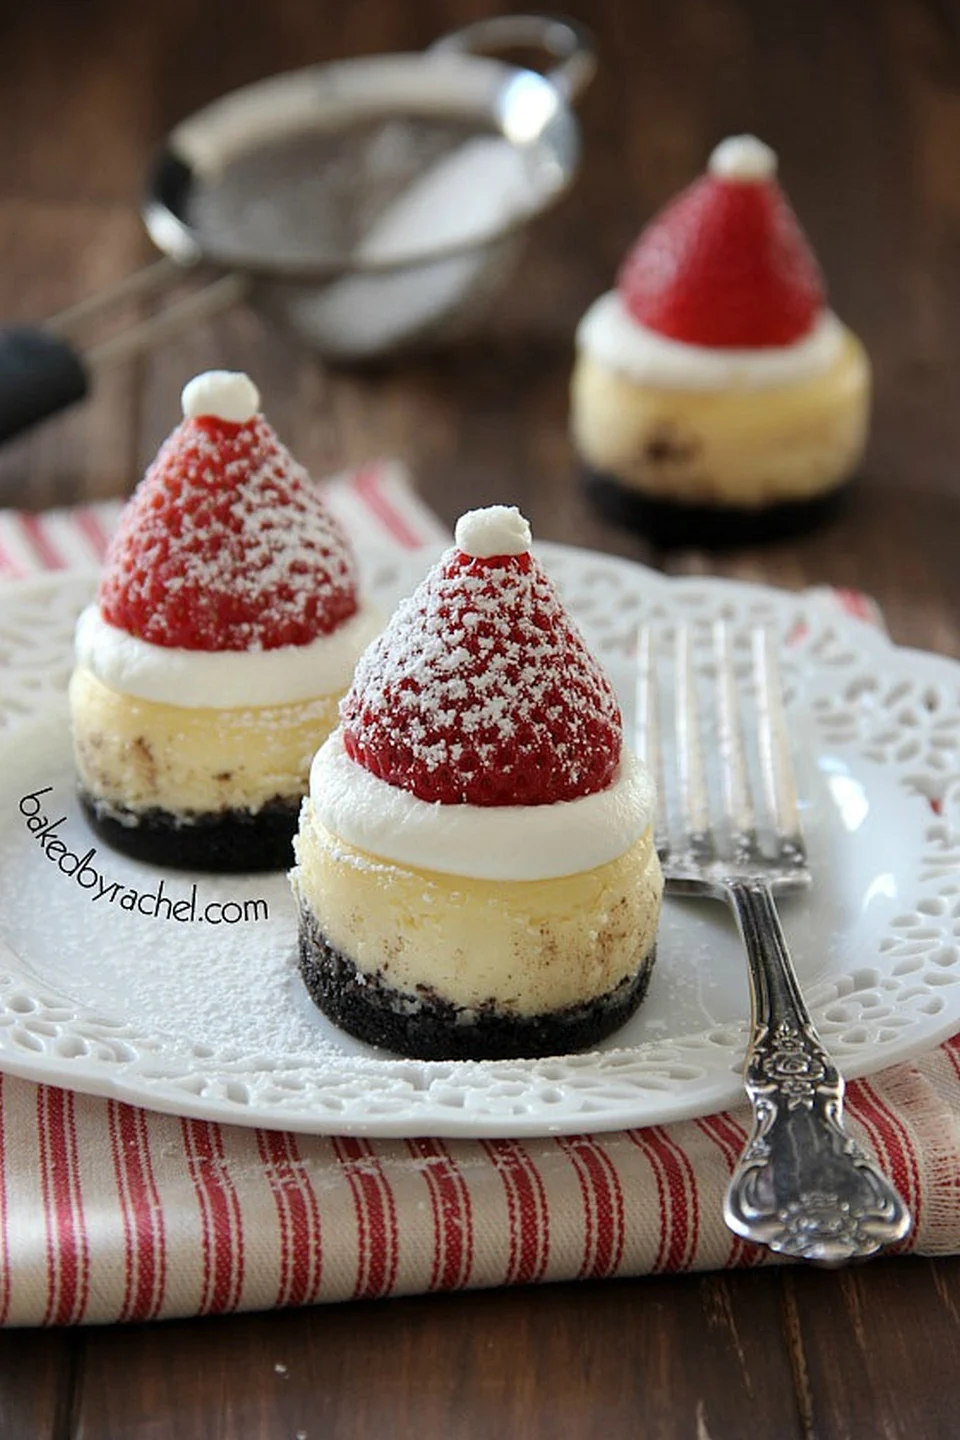
These creamy, rich cheesecakes sit atop a simple graham cracker crust, adorned with a fluffy dollop of whipped cream that resembles Santa’s iconic hat. Aren’t they cute or what?!
Chocolate Gingerbread Mini Cakes
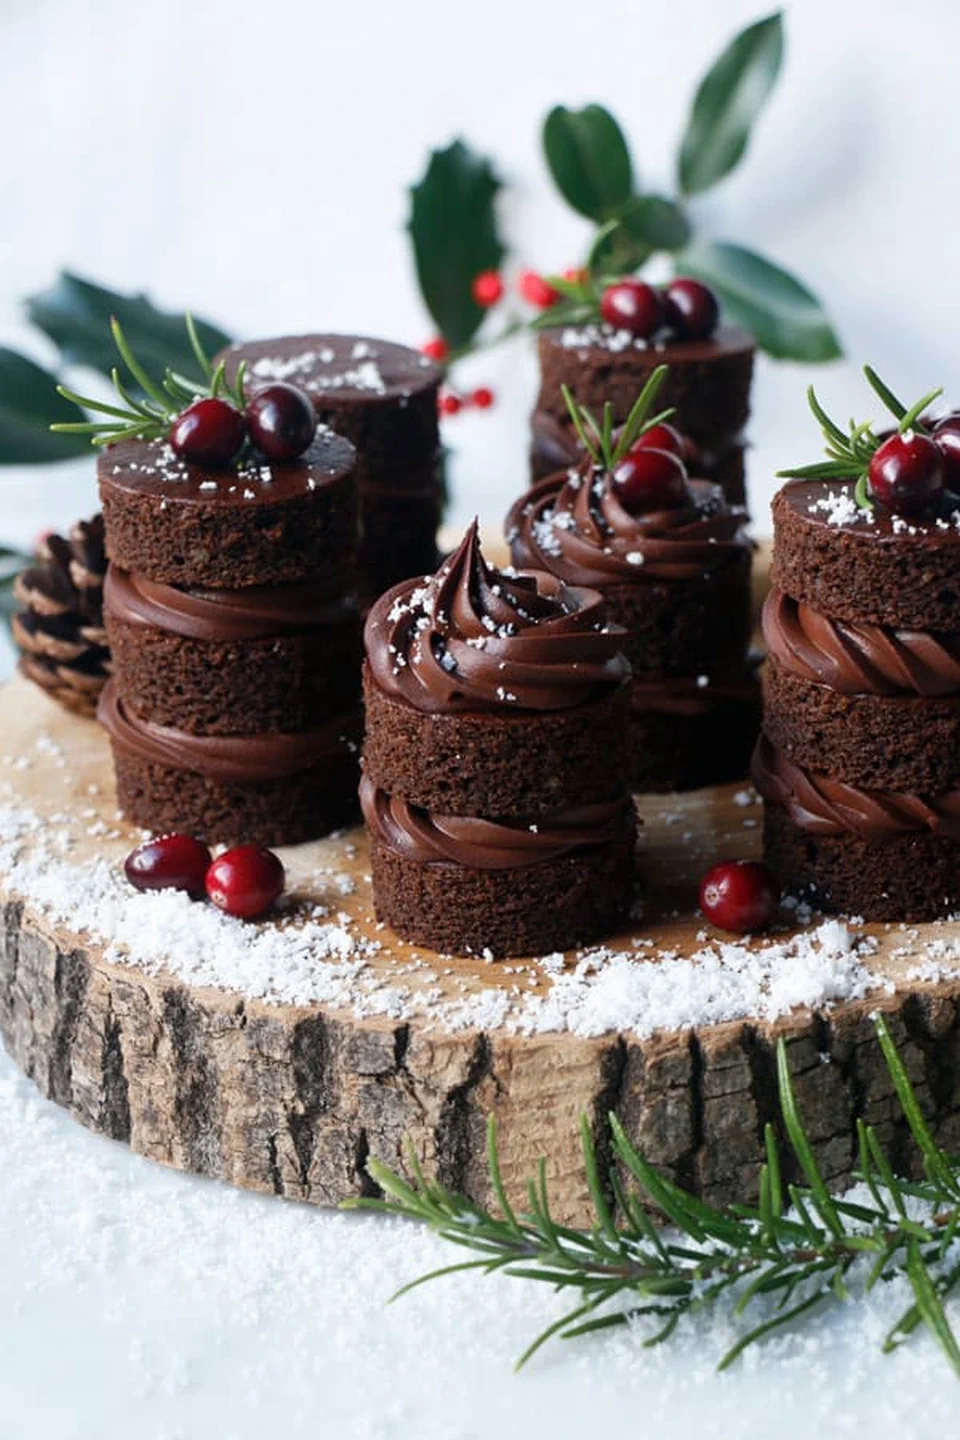
Baking these little treats will fill your kitchen with the warm, inviting scents of the holiday season, creating a cozy atmosphere perfect for family gatherings.
These delightful treats blend the rich flavor of chocolate with the spicy notes of gingerbread, making them one of those delicious Christmas desserts everyone looks forward to.
Chocolate Crinkle Cookies
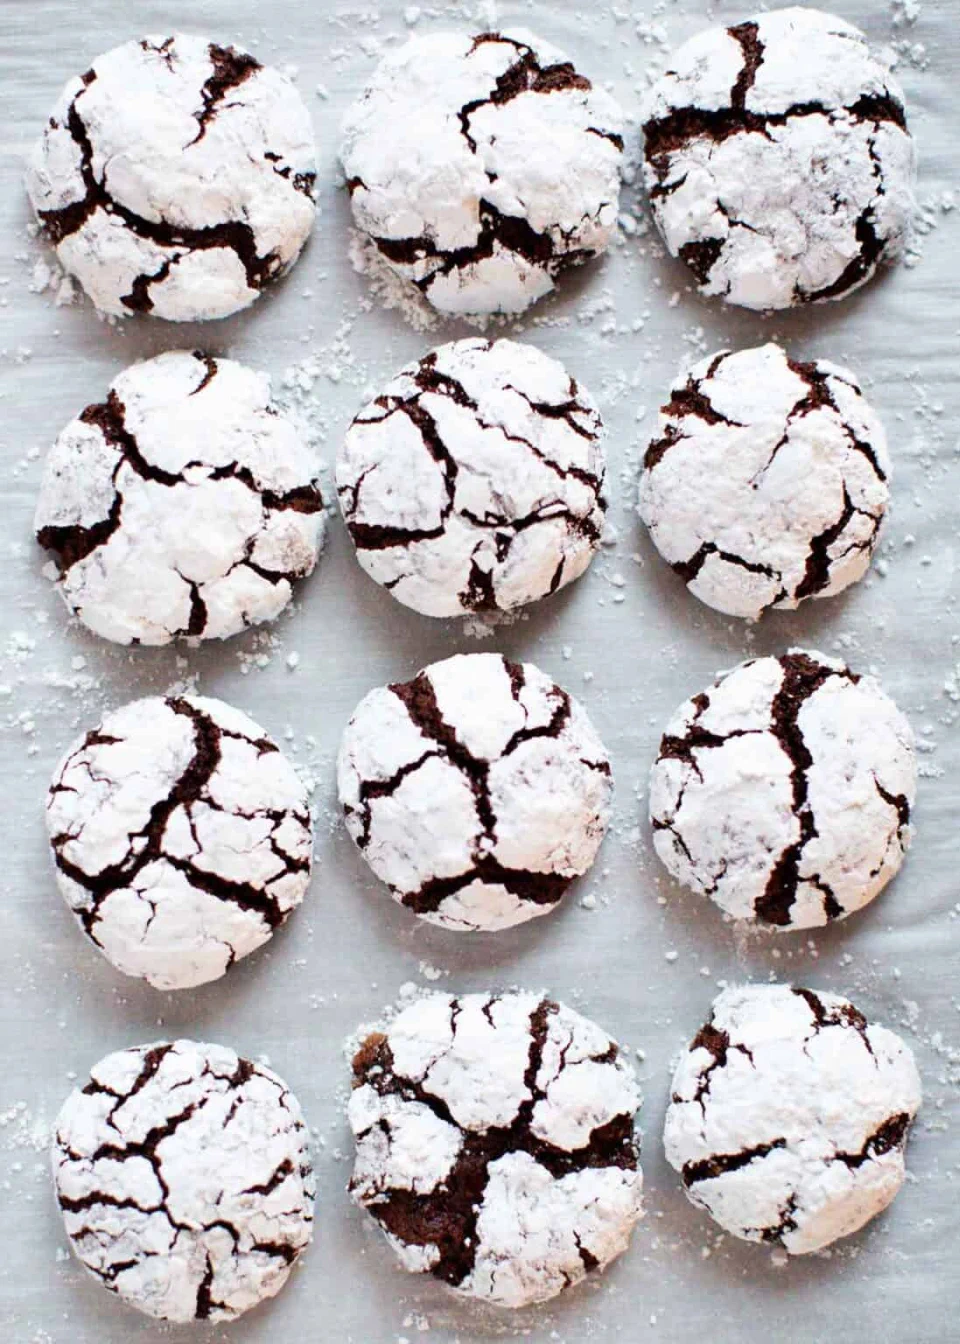
Few things capture the essence of Christmas quite like Chocolate Crinkle Cookies, with their irresistible fudgy centers and snowy powdered sugar coating. These cookies are more than just treats; they’re memories waiting to happen.
Christmas Tree Cupcakes

These adorable treats aren’t just Xmas desserts; they’re a canvas for creativity and fun. You can use a piping bag to swirl the frosting high, creating that perfect pine-tree peak. Decorate your cupcakes with colorful candies, edible glitter, or sprinkles—maybe even little star-shaped toppers to complete the festive look.
Fairy Bread Christmas Crack
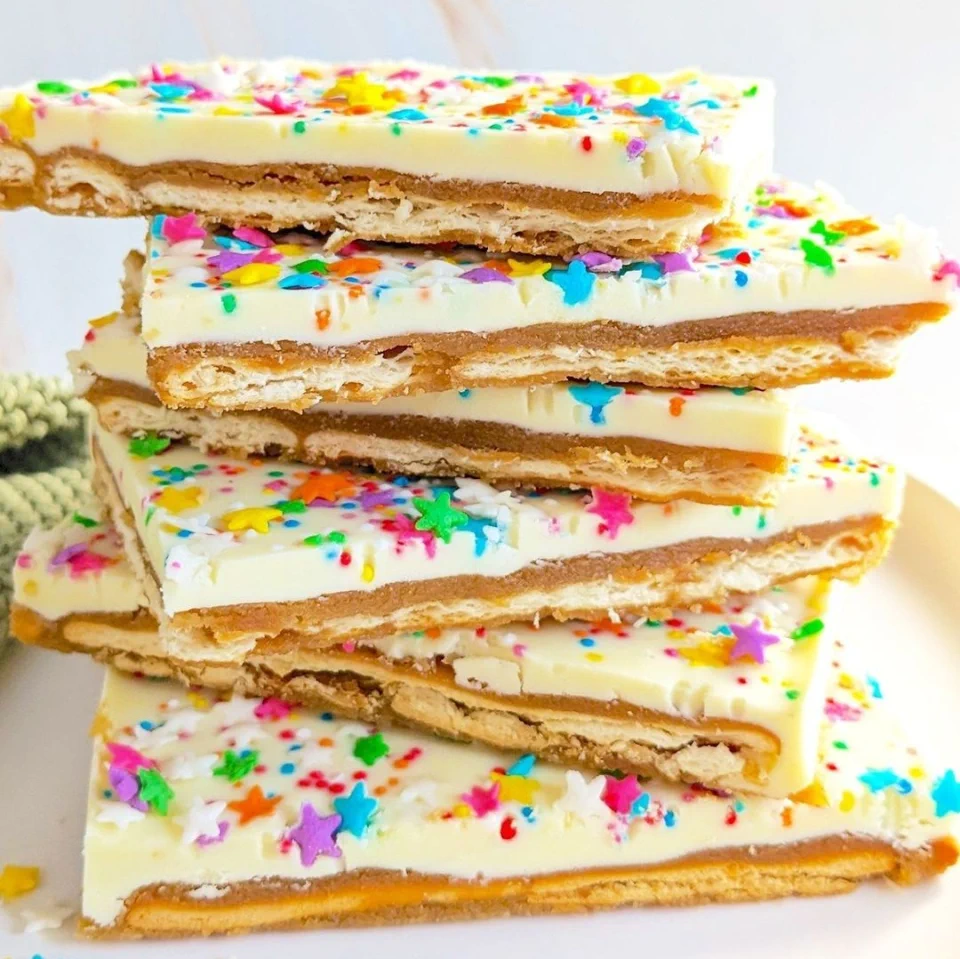
This whimsical dessert combines the nostalgia of childhood snacks with the magic of the season, making it one of the best Christmas recipes you can prepare.
Raspberry and Cream Chocolate Cakes
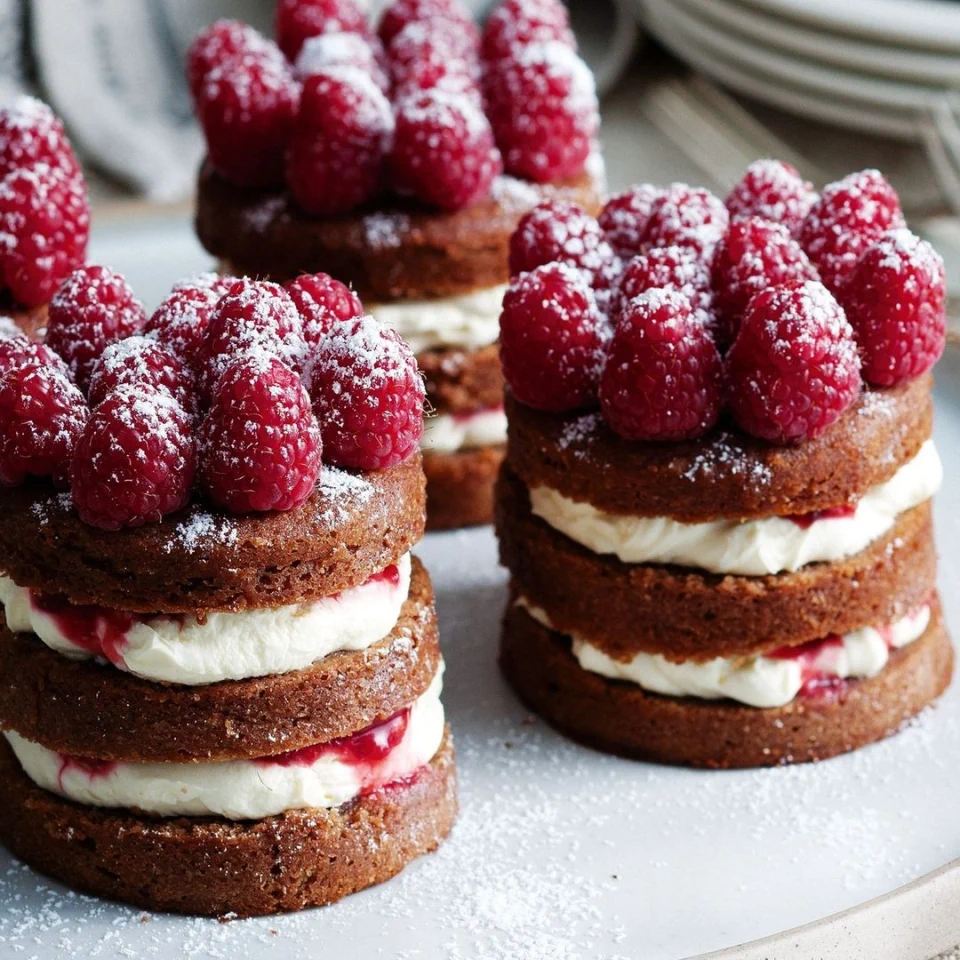
With their luscious raspberry filling and creamy frosting, these cakes are perfect for baking for a crowd, ensuring everyone gets a taste of that nostalgic joy.
Condensed Milk Rocky Road
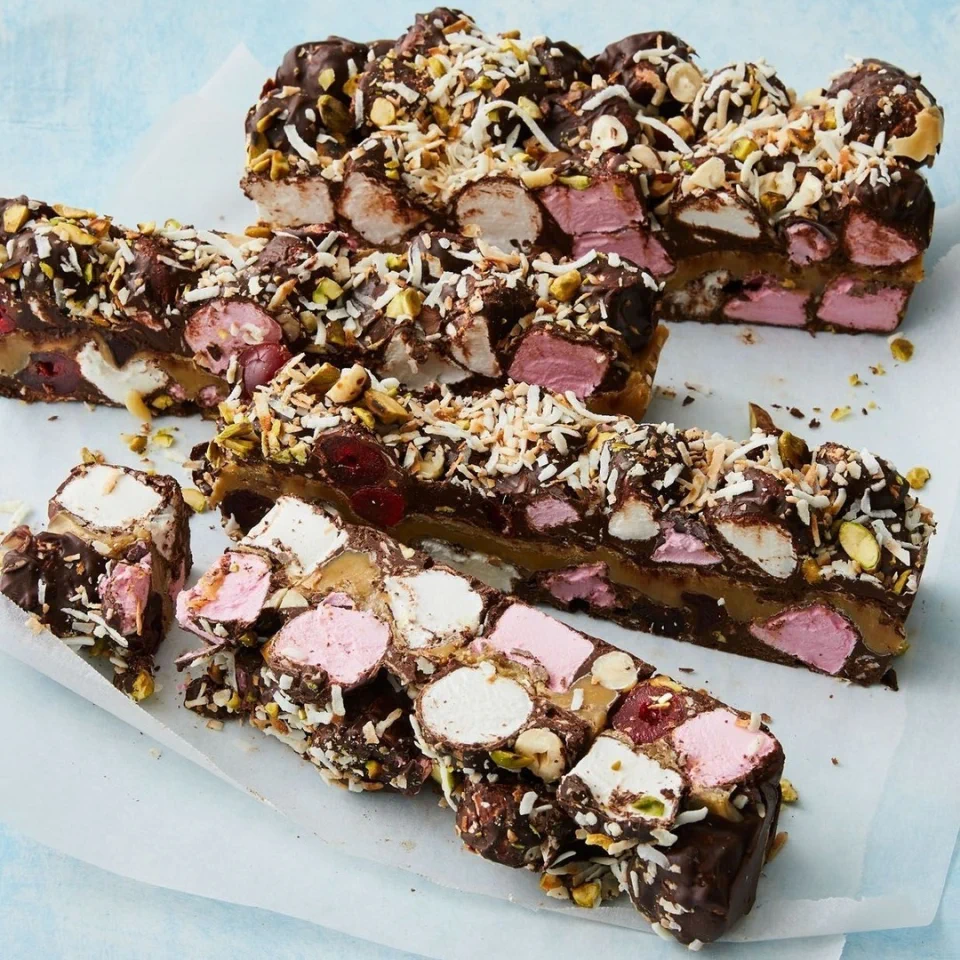
This old school dessert is a timeless treat that brings back memories of cozy holidays spent with family, where the kitchen buzzes with excitement and the air is filled with the sweet aroma of chocolate.
Classic Cherry Delight
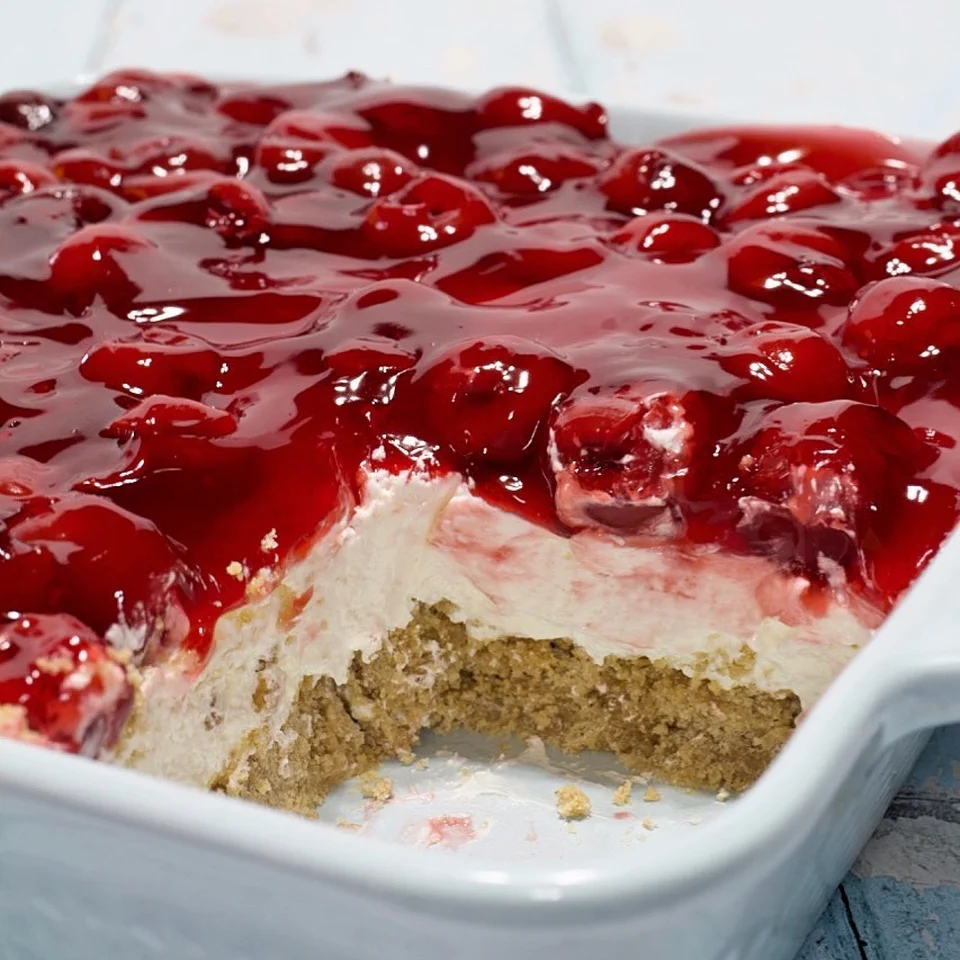
This dessert isn’t just about taste; it’s about memories, laughter, and the warmth of family traditions. With vibrant red cherries glistening on a creamy, velvety layer, it’s like it invites everyone to dig in.
Grilled Stone Fruit and Honey Cream Pavlova Stack
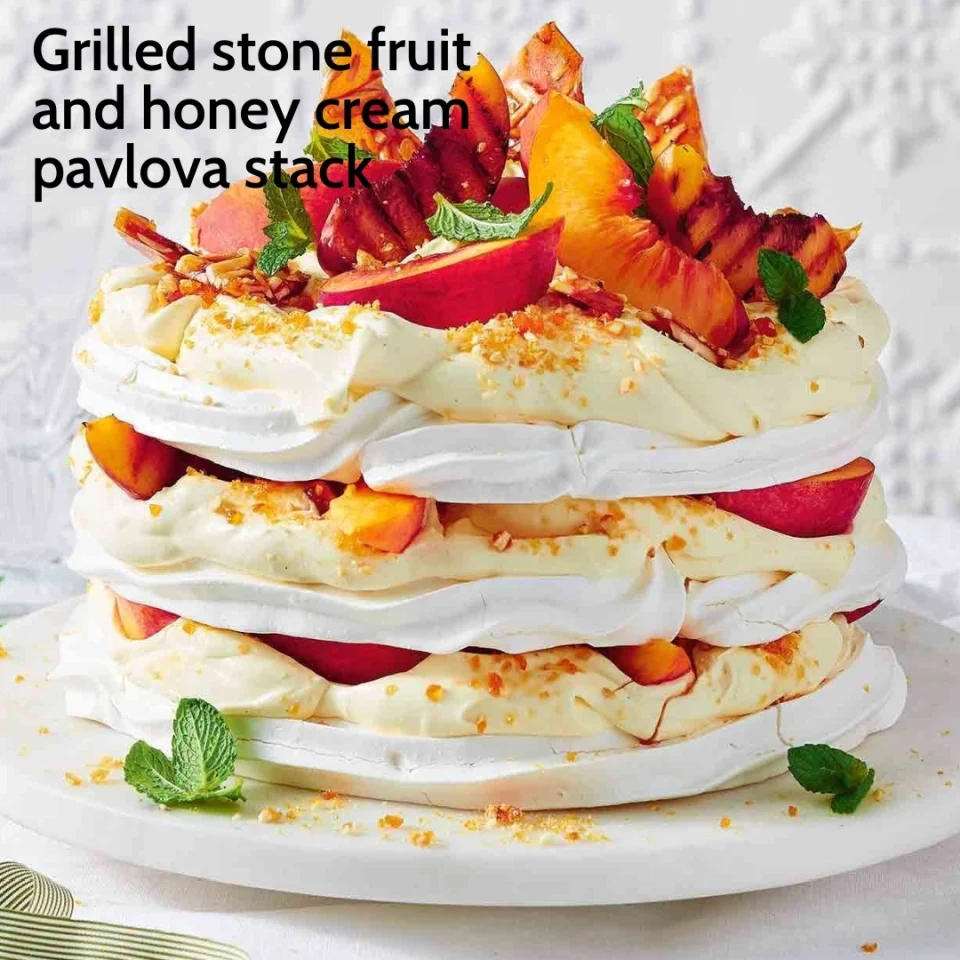
This dessert is a stunning centerpiece that brings both elegance and warmth to your holiday celebrations.

